These meals will make you want to travel, just to eat!
Prepare yourself to drool over these 41 meals, each featuring mouthwatering photos, details, and where you can eat it.
I've also included some of my personal travel eating tips and answered some of your top questions... like "Mark, how do you make money to travel?".
Taipei travel guide for food lovers
Introduction to Taipei
If you love food, this Taipei Travel Guide is for you!
Having heard about the amazing night markets and the abundance of delicious food, I knew Taipei would be a city that any food lover should visit at some point. And so I was excited to have an opportunity to visit.
My wife and I ended up staying for almost two full weeks in Taiwan’s biggest city, and both the food and the friendliness of the people, kept us wanting to stay longer.
Taipei is a big, but very manageable, modern, clean, and friendly city. It’s easy and hassle free to get around, there’s an amazing selection of restaurants and street food, and the night markets, with their never ending supply of interesting foods, are a highlight.
In this Taipei travel guide blog I’ll be sharing with you travel details from my personal trip there, plus lots of food.
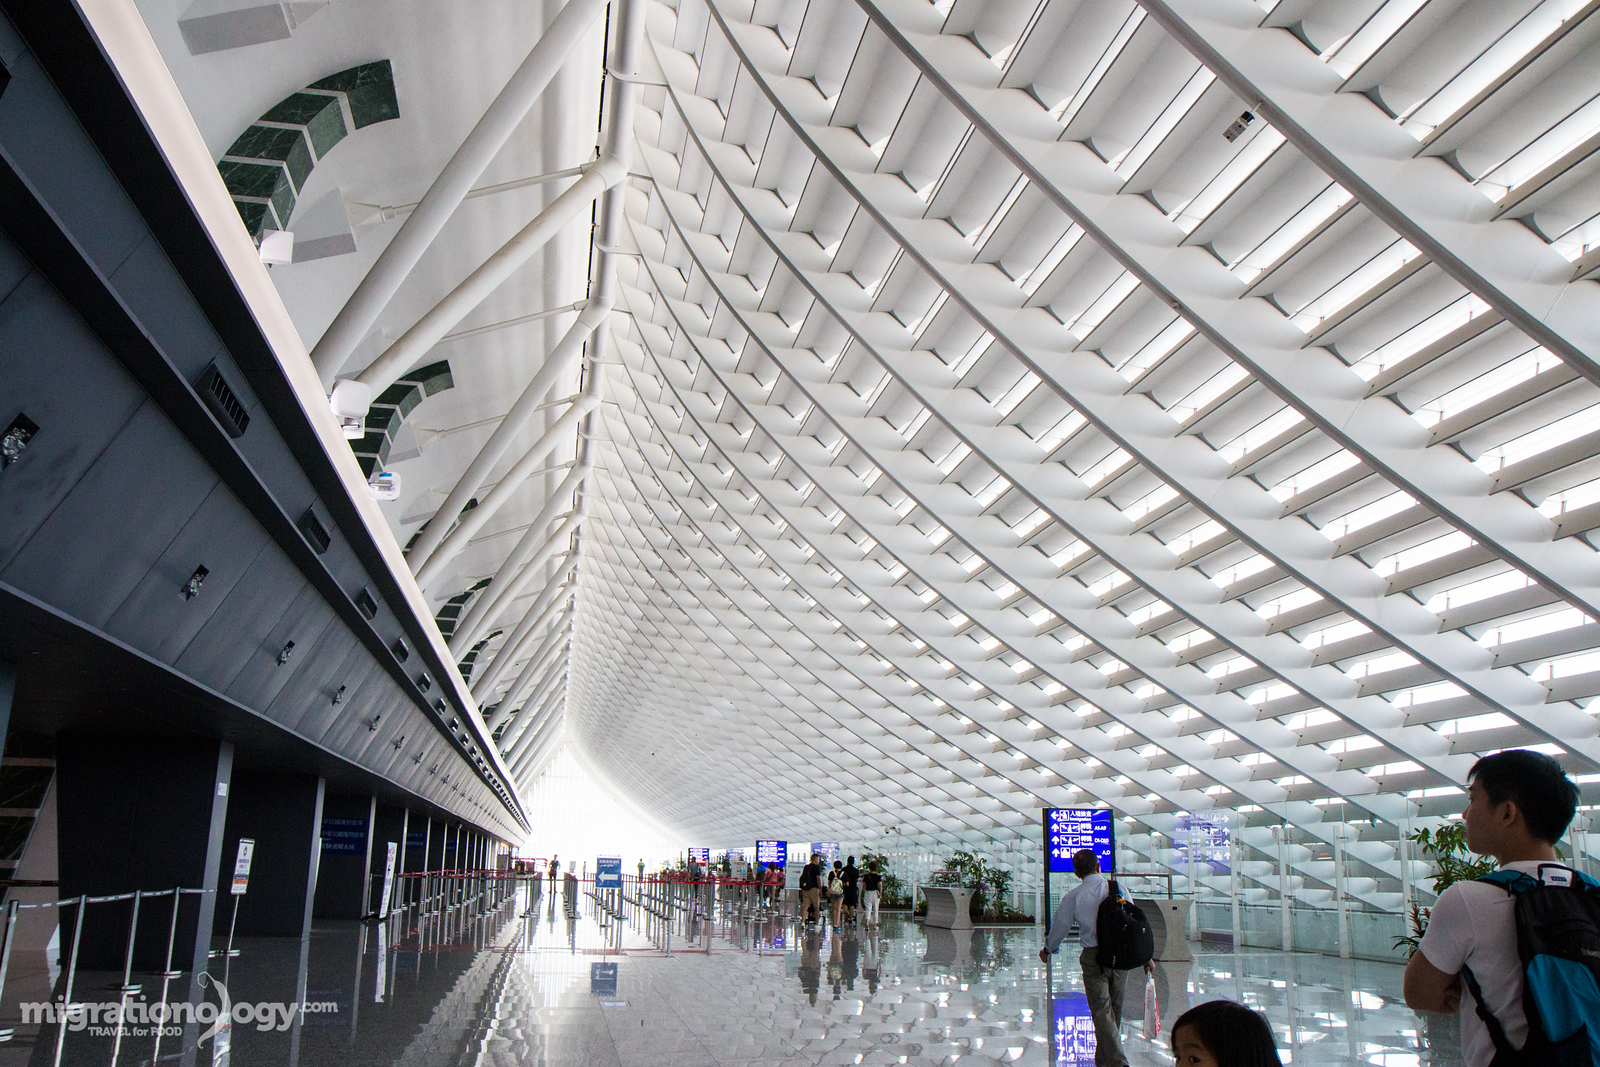
Landing at Taiwan Taoyuan International Airport
Arriving and Leaving Taipei
If you fly into Taipei on an international flight, most likely you’ll land at Taiwan Taoyuan International Airport. It’s located north of Taoyuan City, to the west of Taipei City. It takes about an hour or more to get from the airport to the center of the city.
Here’s how I got into the center of Taipei from the airport.
Once you go through immigration and grab your bag, you then exit the airport and look for the signs leading to the High Speed Rail / Bus Station.
At the bus counter there are a bunch of different buses you can take. I bought a ticket with UBus that went directly to THSR Taoyuan Station – 30 TWD ($0.96)
At THSR Taoyuan Station I bought a ticket on the high speed train to Taipei Station – 165 TWD ($5.28)
From Taipei Station you can get the local Metro to whichever station you need to get to.
The journey from the airport to Taipei city center can take about 1 – 1.5 hours, so it’s important to be aware of that, both for when you arrive or leave.
When leaving Taipei, you can take the same journey, just in reverse. When you get to THSR Taoyuan Station, there will be a line of buses waiting, that go straight to the airport.
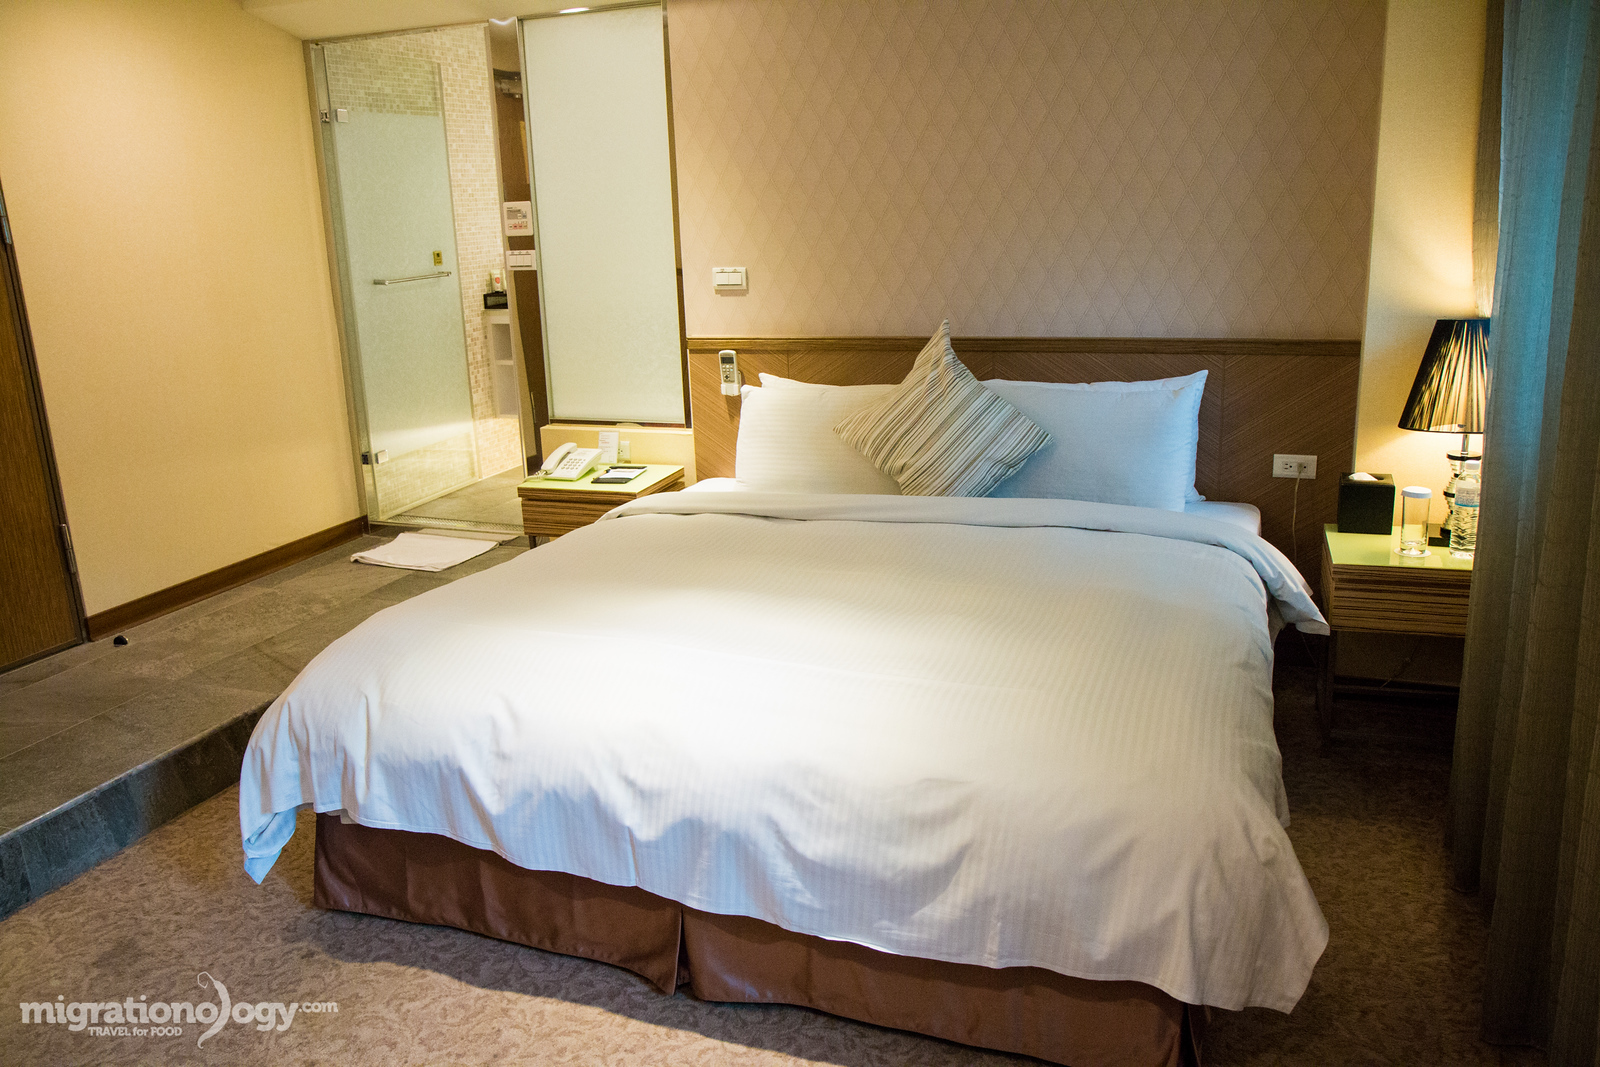
Homeyhouse – a great place to stay in Taipei
Places to stay in Taipei
Choosing a place to stay when you’re in Taipei, and picking a good location, is one of the keys to having a successful trip. If you can get a good place to stay in a good location, that improves everything during your trip.
I’d also like to mention that in comparison to some other cities, the good thing about Taipei is that the central part of the city is really not all that big, and public transportation is really good. So even if you’re staying somewhere a bit far out, as long as you’re close to a public transportation station, it should still be pretty easy to get around.
Here are a couple of best areas in Taipei to consider staying in and why, and a couple of hotel suggestions in each.
Ximending is the shopping, nightlife, and entertainment heart of Taipei. If you want to stay at a hotel where you walk out the front door and have all-you-can handle shopping, street food and restaurants, and plenty of people watching opportunities, Ximending has some of the best places to stay in Taipei. You’ll find everything from budget hotels like Energy Inn, and plenty of mid-range hotels like Via Hotel Ximen. Do some good research though, because there are also quite a few love hotels in Ximending.
Zhongshan is one of the main districts of Taipei, and it’s considered both the center of Taipei tourism, and a central business district of Taipei. If you want to feel like you’re in the heart of suburban Taipei (yet with plenty of pleasant neighborhood side-streets), Zhongshan is a great area to choose. There’s plenty of shopping and restaurants to choose from. Zhongshan has a range of hotels from mid-range like Homeyhouse Hotel where I stayed to many high end hotels like the elegant Okura Prestige Taipei.
Another one of Taipei’s main districts, that includes a mix of business and residential is Da’an district. You’ll find a mix of everything in this area of Taipei, and it’s just a short distance from Yongkang Street which has plenty of great restaurants, cafes, and places to hang out. In Da’an district accommodation tend to be on the higher end side like the trendy Home Hotel Da’an and Shangri-La, but there are also some budget places to stay like Green World Hostel.
When my wife and I were in Taipei while writing this Taipei travel guide, we I stayed at two different hotels, and here are the pros and cons of each.
Here’s where I stayed:
Go Sleep Hotel Xining (Ximending, I paid about $75 per night for a triple room) – Right after landing in Taipei, my wife and her sister and I checked into Go Sleep Xining Hotel, located in the busy fashion district of Ximending. The hotel, located on the top of a building, was basic, a little old, but it had everything we needed, and I thought it was of decent value. The location is great, right in the heart of the main fashion, shopping and young cultural area of Taipei.
Homeyhouse Hotel (Zhongshan District, I paid about $50 per night for a double deluxe room) – Halfway through our trip to Taipei, my wife and I transferred to Homeyhouse Hotel, which was an excellent place, and a completely different environment. The hotel itself was very nice, the staff were friendly, and the room was spacious and modern – even including a high-end electronic heated toilet seat. The only thing is that it is about a 10 – 15 minute walk from the nearest Metro station (Zhongshan station), which was not an issue for my wife and I as we love to walk, but it is something to think about.
I’d highly recommend Homeyhouse as my favorite place my wife and I stayed during our trip to Taipei.
NOTE: The links to hotels are affiliate links, meaning that if you make a hotel booking, at NO extra cost to you, I will get a small commission. Thank you for your support.
Travel packing list
A good travel packing list makes it easy to pack quickly and not forget anything. Here are some of the essentials I carried with my during my trip to Taipei:
Taipei, just like many cities in Asia like Bangkok or Seoul, has an incredible food culture, and in Taipei, there seems to be a never ending supply of delicious and interesting foods to try.
One of the best things about eating in Taiwan is that there are many different types of Chinese and even Japanese food influences in the cuisine. And along with local Taiwanese dishes, you’ll find restaurants in Taipei that serve dishes from around continental China.
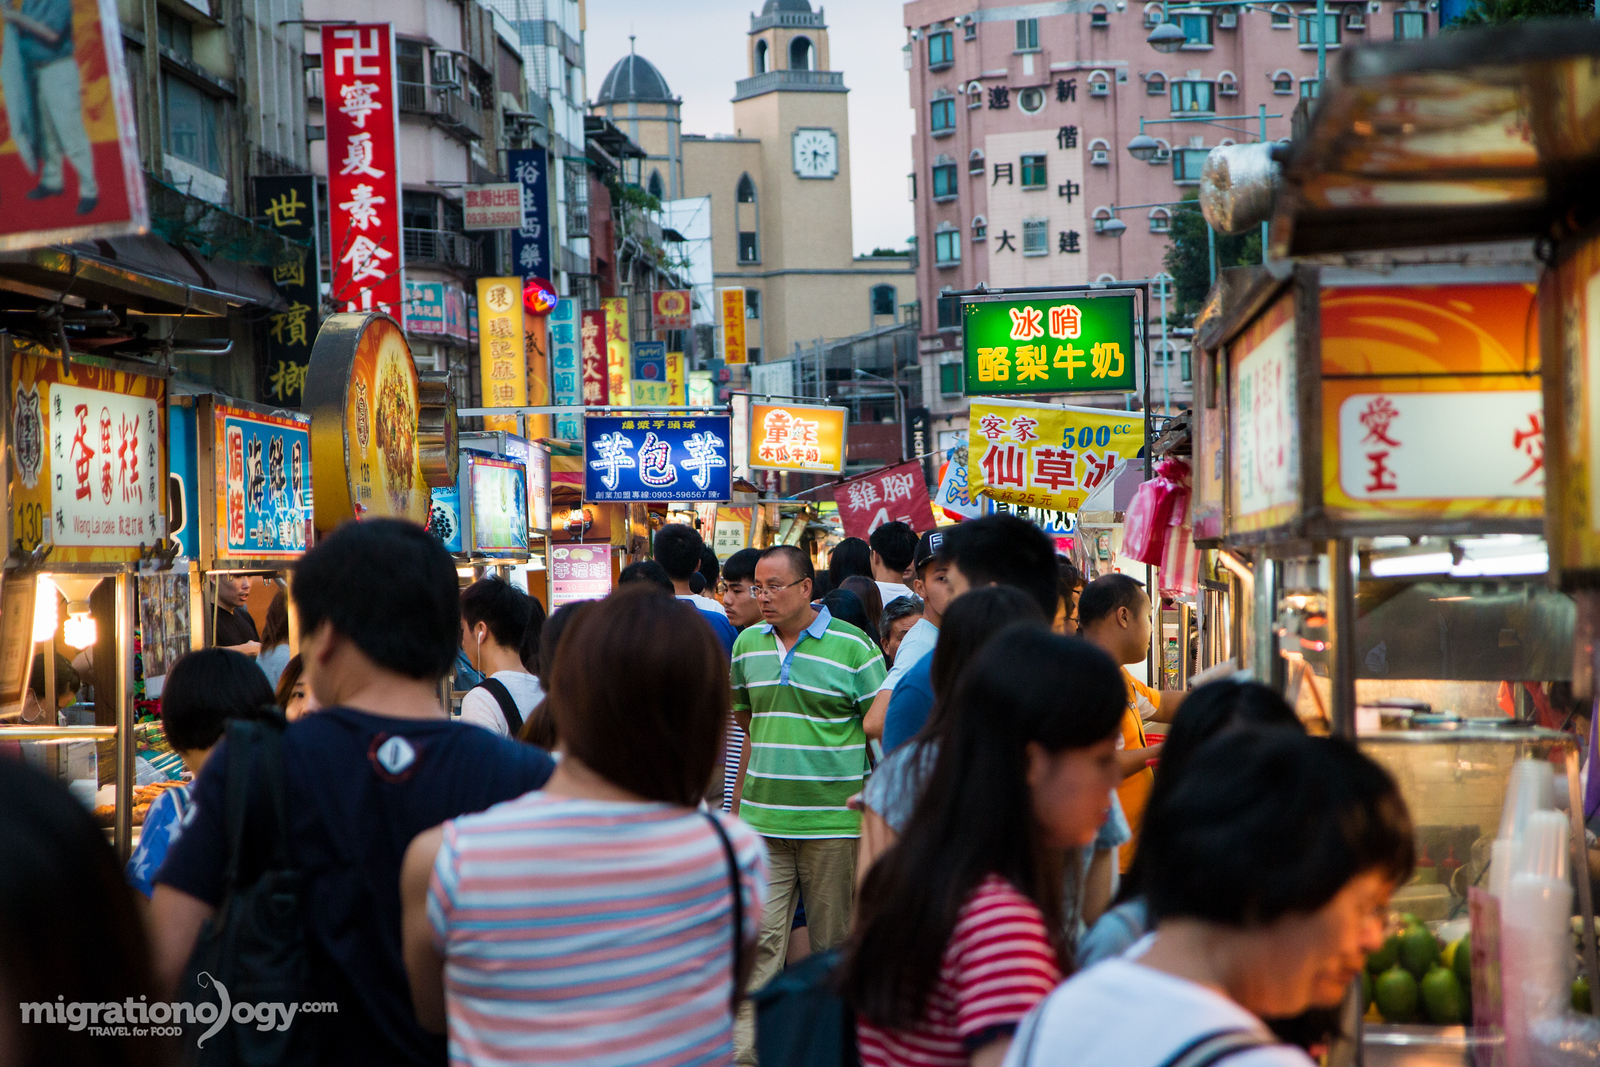
Additionally, Taiwan is one of the world leaders when it comes to night markets… there are so many different night markets throughout Taipei that offer both shopping and an opportunity to walk around and feast.
In this Taipei Travel Guide for Food Lovers I’ll first share some of my favorite Taipei food night markets and some of my personal favorite Taiwanese dishes.
Night markets in Taipei
Best Taipei Night Markets:
There are lots and lots of night markets in Taipei, and I wasn’t able to visit them all, but out of the ones I did visit, here are my favorites.
Shilin Night Market – Despite being the most famous and one of the biggest night markets in Taipei, and also supposedly one of the most touristy markets as well, after visiting, I still think it’s a must visit night market when you’re in Taipei. The sheer size of the market, the busyness of the lanes, the amount of snacks and shopping, and just the amount of people that go there, give the market a lot of energy. You’ll find things like fried dumplings, everything on skewer, and blowtorched steak.
Raohe Night Market – One of the things I loved about Taipei is that even when some attractions or markets are well publicized and have potential to be too touristy, they still remain pretty local in many ways. Raohe Night Market is another famous night market, and while there are many tour groups that frequent the market, I found it to be an amazing mix of shopping and food, plus packed with Taiwanese culture. While Shilin Night Market is exciting and energizing, Raohe is much more relaxed and has more of a friendly neighborhood feel to it. One of the best things to eat at Raohe Night Market are the pepper pork buns right at the entrance of the market and pork ribs soup.
Ningxia Night Market – Ningxia Night Market is a Taipei night market that I just kind of showed up at without much planning, and it turned out to be fantastic. The market is exclusively focused on food and I didn’t really notice any other stalls, just solid food. It has a neighborhood feel, in a good location, still very much local, and there are lots of food choices. I enjoyed the skewers of meat and vegetables, all grilled and seasoned, and also there are a number of legendary oyster omelet restaurants at this night market.
Keelung Miaokou Night Market – This night market is not in Taipei, but because it’s close enough and easy enough to get here, and because it’s one of the most mind-blowing displays of food in one place, I’ve included it on this Taipei list. You can get to Keelung City by train in about 30 – 45 minutes from Taipei Station, and what awaits you at Keelung Miaokou Night Market are a few bedazzling streets packed with food.
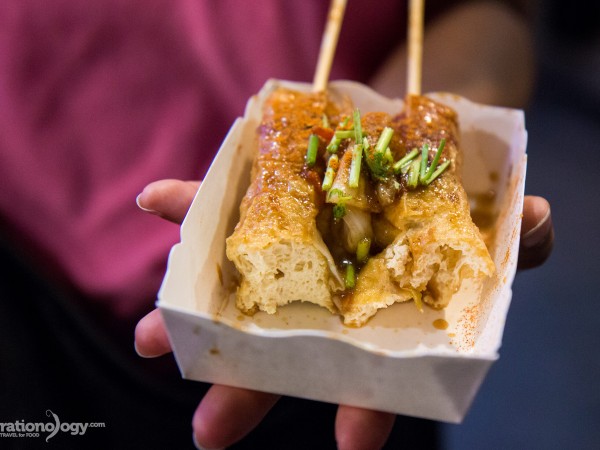
Pepper pork buns – one of my favorite Taiwanese foods
My favorite Taiwanese dishes:
Listed below are just a few of my absolute favorite Taiwanese dishes. For a more complete Taiwanese food guide, be sure to check out Taiwanese Food Guide blog post (coming soon).
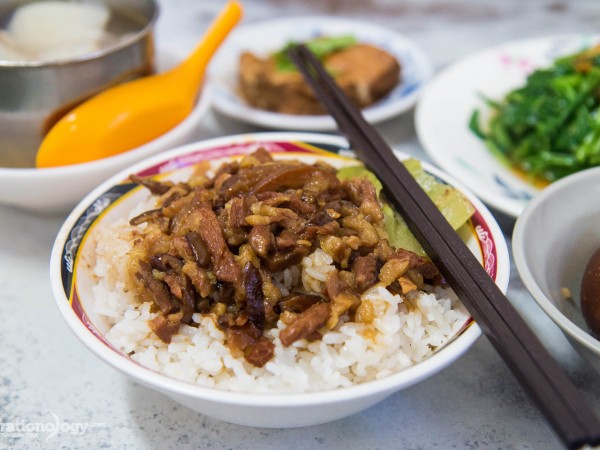
Lu rou fan (minced pork rice) – Considered one of the national dishes of Taiwan, lu rou fan is the combination of rice topped with minced braised pork. The sauce seeps into the rice blending with the fatty, slow cooked, outrageously tender pork. It’s an amazingly comforting simple dish.
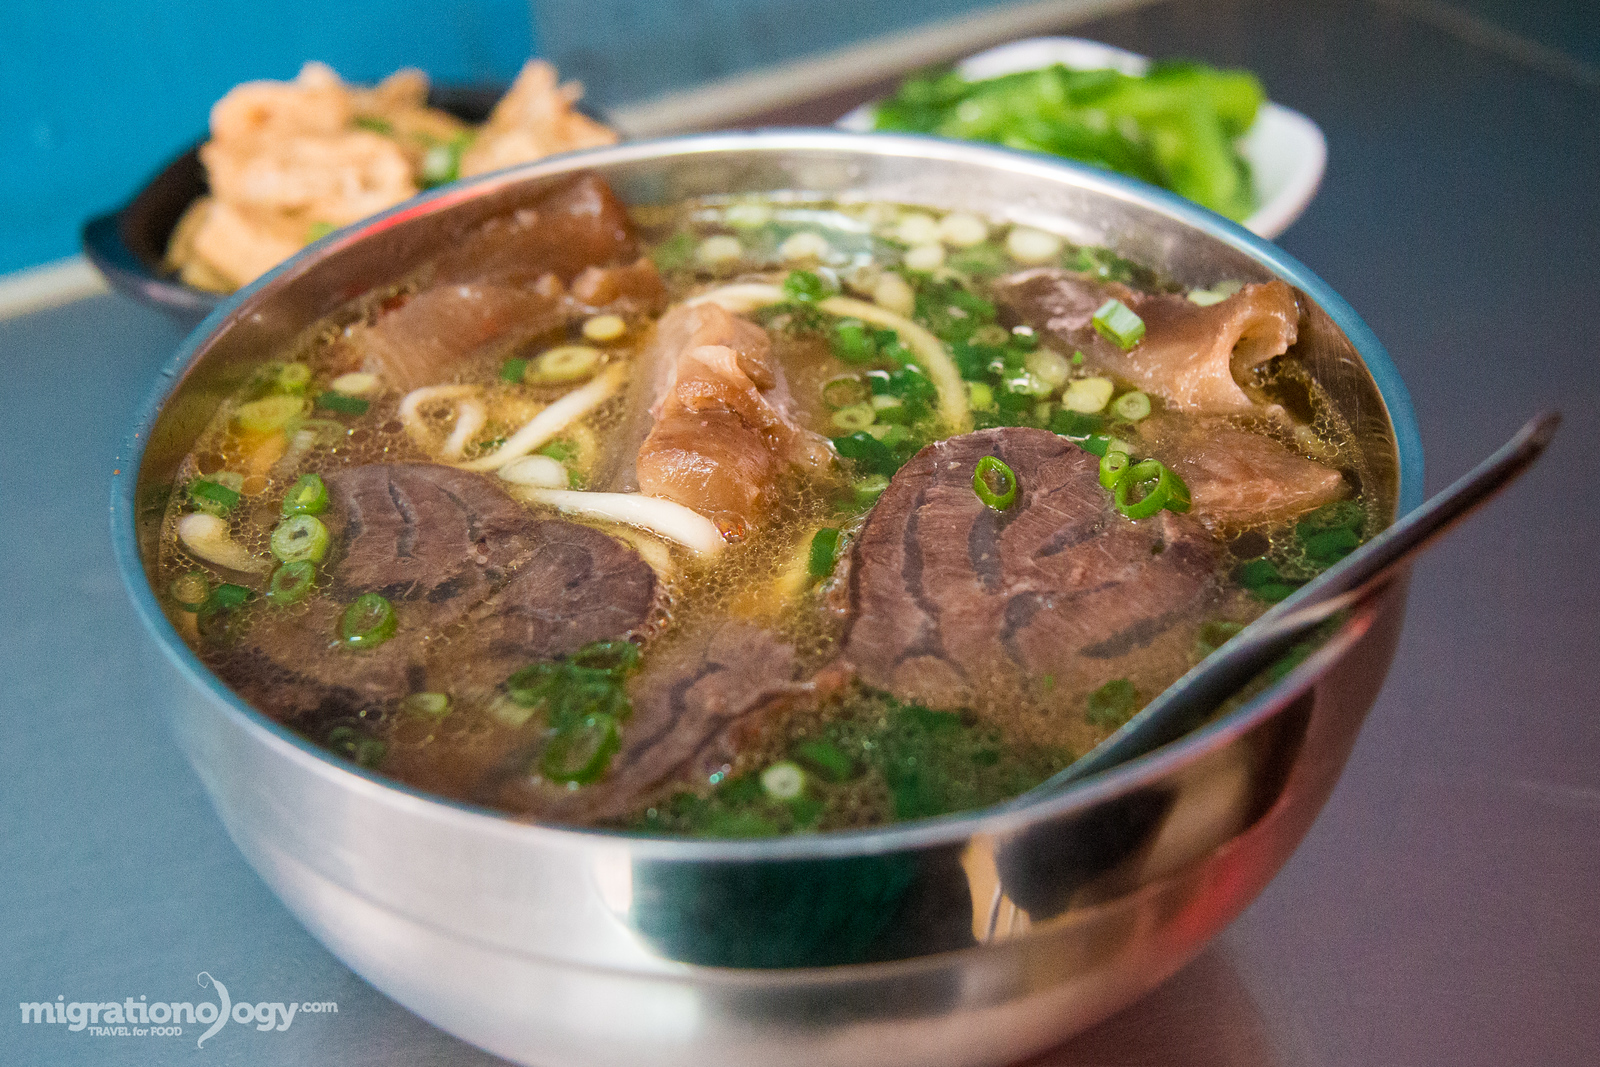
Niu rou mien (beef noodle soup) – Another dish you can’t miss eating in Taipei is beef noodle soup. There are many different types, but the basic combination is a bowl of noodles, topped with tender beef, and a soothing complex beefy broth. Beef noodles are a Taiwanese favorite.
Hujiao bing (pepper buns) – When I think about Taiwanese food, I never really imagined little bread buns, stuffed with a combination of meat and pepper, and baked in an Indian tandoor like oven. But hujiao bing, which is exactly that, is popular in Taiwan, and they are so incredibly delicious when they are piping hot. I could eat them all day long. The best one I had was at Raohe Night Market.
Taiwanese hot pot – Hot pot is a meal popular all over Asia, and in Taipei it seems like every second restaurant serves hot pot. There are some different regional variations and even Japanese style shabu shabu in Taipei, but the basic components of a hot pot meal include a personal or table-side pan of boiling soup where you dip meat and vegetables in to cook right before you eat.
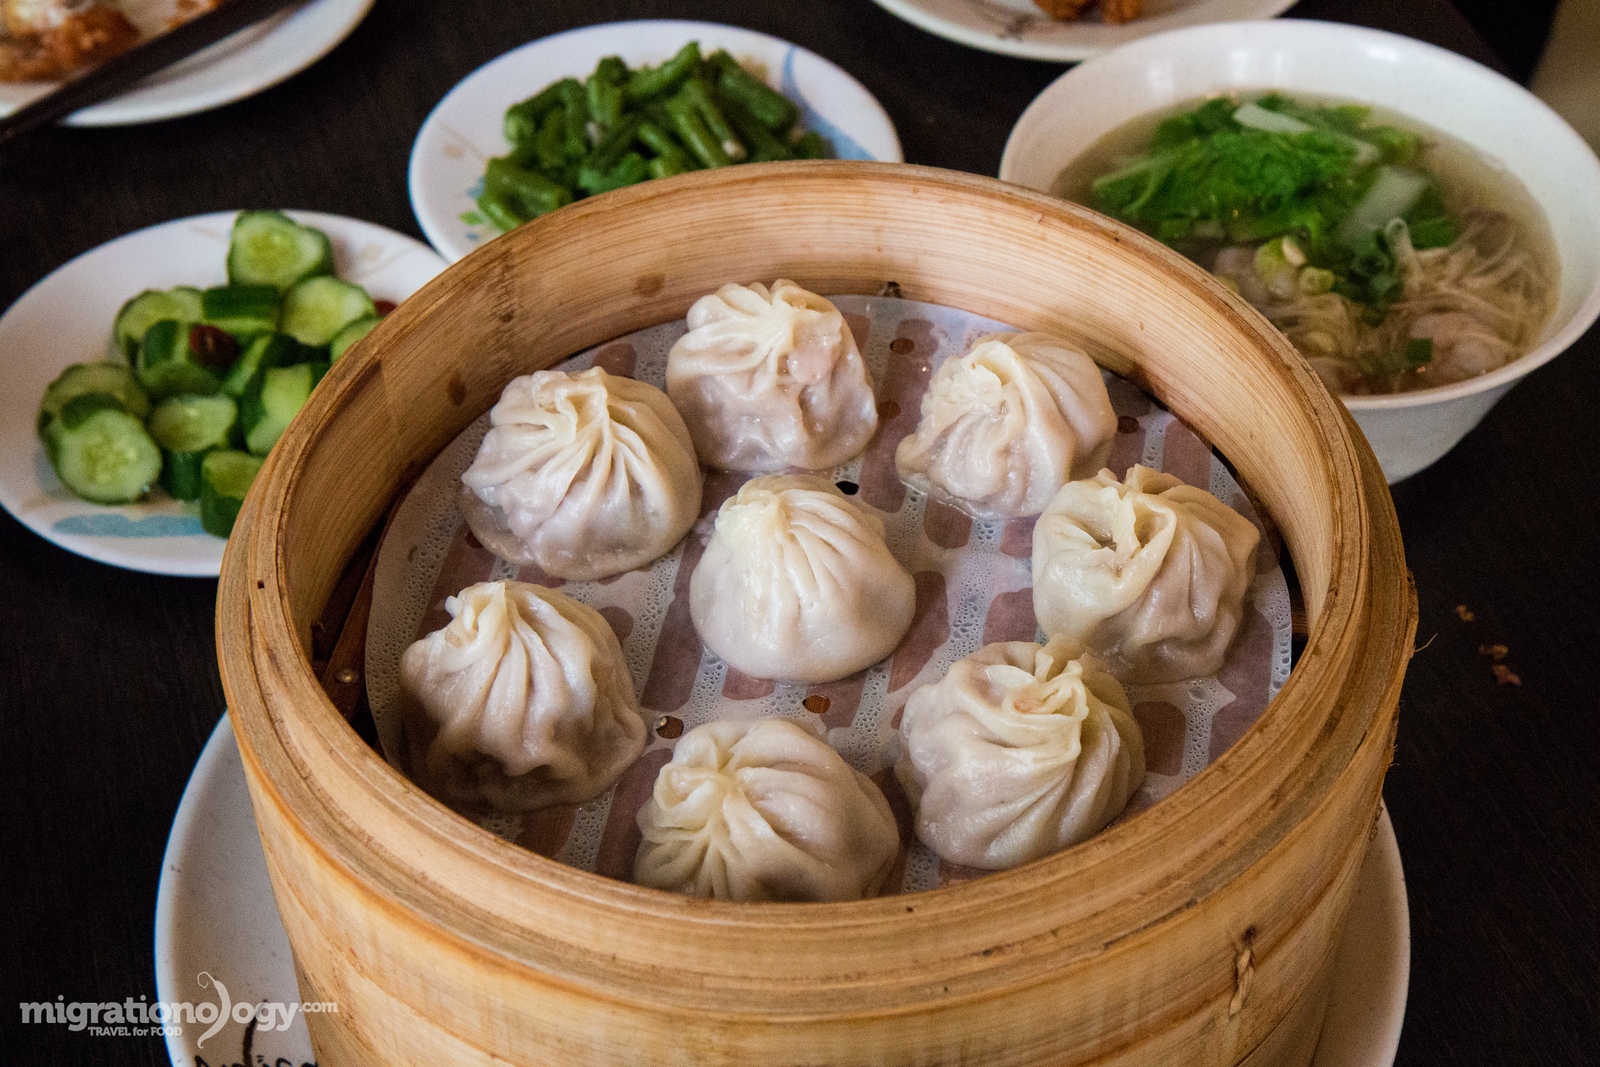
Xiaolongbao (soup dumplings) – Likely the most famous Taiwanese food in the world, in a large part due to the expansion of Din Tai Fung restaurant, are xiaolongbao, steamed soup dumplings. Despite their widespread popularity, xiaolongbao are originally from mainland China in Jiangnan near Shanghai. A tray of steamed soup dumplings with some extra side dishes, makes an outstanding meal in Taipei.
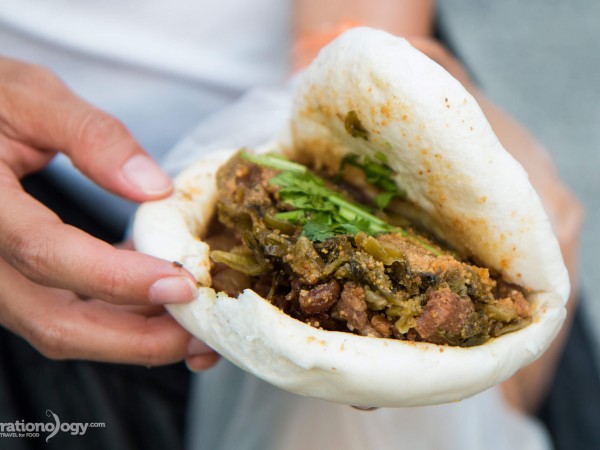
Gua bao (pork belly sandwich) – Looking for one of the ultimate Taiwanese snacks? Gua bao, which is similar to a sandwich made with a steamed piece of bread stuffed with braised pork belly and pickled mustard greens, is one of the finest Taiwanese hand-held creations.
Bubble tea – I’m personally not a huge bubble tea drinker, but my wife, along with basically the entire population of young people in Taiwan, are crazy for it. Bubble tea typically consists of extremely milky tea filled with boba tapioca pearls. What I do like about ordering bubble tea in Taiwan is that you can typically choose your sweetness level, or even choose to have no sugar at all. Bubble tea is definitely a Taiwanese national treasure of a beverage, and it’s now found just about everywhere in the world, from Bangkok to Los Angeles.
Chou doufu (stinky tofu) – There’s no other food in Taiwan that’s more noticeable by smell or that has more passionate food followers, as the infamous Taiwanese stinky tofu, a national dish. On my first stinky tofu experience in Taiwan, I didn’t even know I had ordered it. It definitely had a little bit of a rotting taste to it, but I quite enjoyed it – it’s a bit unique and something you have to eat in Taipei.
Latest Taipei blog posts
Incredible Pork Belly Bun in Taipei: Lan Jia Gua Bao (藍家割包)
4 Comments
Taiwan does braised pork, in all styles and flavors, really well. One of the most popular Taiwanese dishes that includes braised pork is lu rou fan, braised pork belly, minced up and topped over a bowl of rice. But another…
Food to Eat at Shilin Night Market (and Surprise Stinky Tofu)
7 Comments
Undoubtedly the most well known of all the night markets in Taipei is Shilin Night Market. It’s huge, busy, overcrowded, packed out to overcapacity every single night, and there’s an almost unbelievable amount of street food snacks to taste and experience….
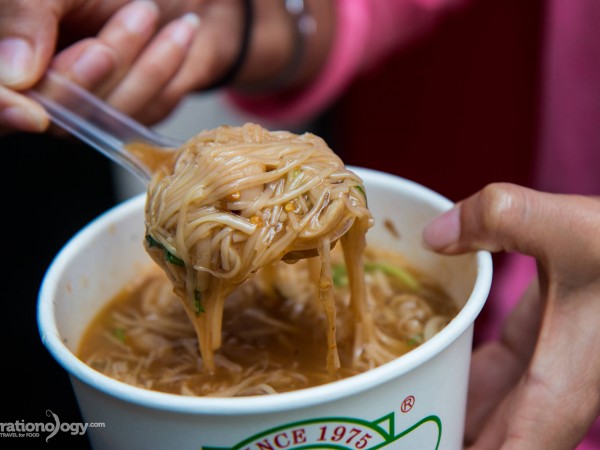
Ay-Chung Flour Rice Noodles: Don’t Miss This Goopy Snack
3 Comments
One of the best signs of good food when you travel is a big crowd. And preferably a big crowd that’s standing around on the street or sidewalk, some waiting in line and others already happily eating scattered around. Located…
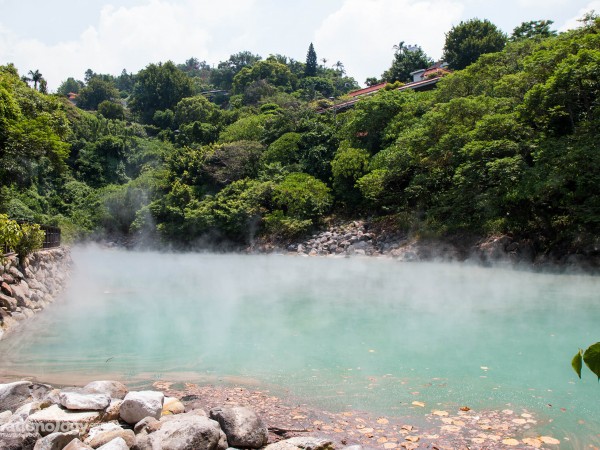
Day Trip to Beitou Hot Springs (and an Unexpected Taiwanese Feast)
18 Comments
One of the most relaxing things to do anywhere, is sit in a natural hot spring. Located within Taipei city limits is Beitou, a natural hot spring recreation area in the city. During our stay in Taiwan, we decided to…
Jin Feng (金峰魯肉飯): Taipei’s Most Famous Braised Pork Rice Bowl
6 Comments
If you spend any time in Taiwan, you’ll quickly realize that one of the most simple and most locally loved dishes is lu rou fan (滷肉飯), the simple combination of rice topped with braised minced pork. It can be served and…
Lin Dong Fang: You’ll Love These Beef Noodles in Taipei
17 Comments
Taiwan is full of delicious things to eat. And while you can choose from a variety of Taiwanese favorites like xiao long bao and stinky tofu, there’s one dish that might top the list of most beloved and most sought…
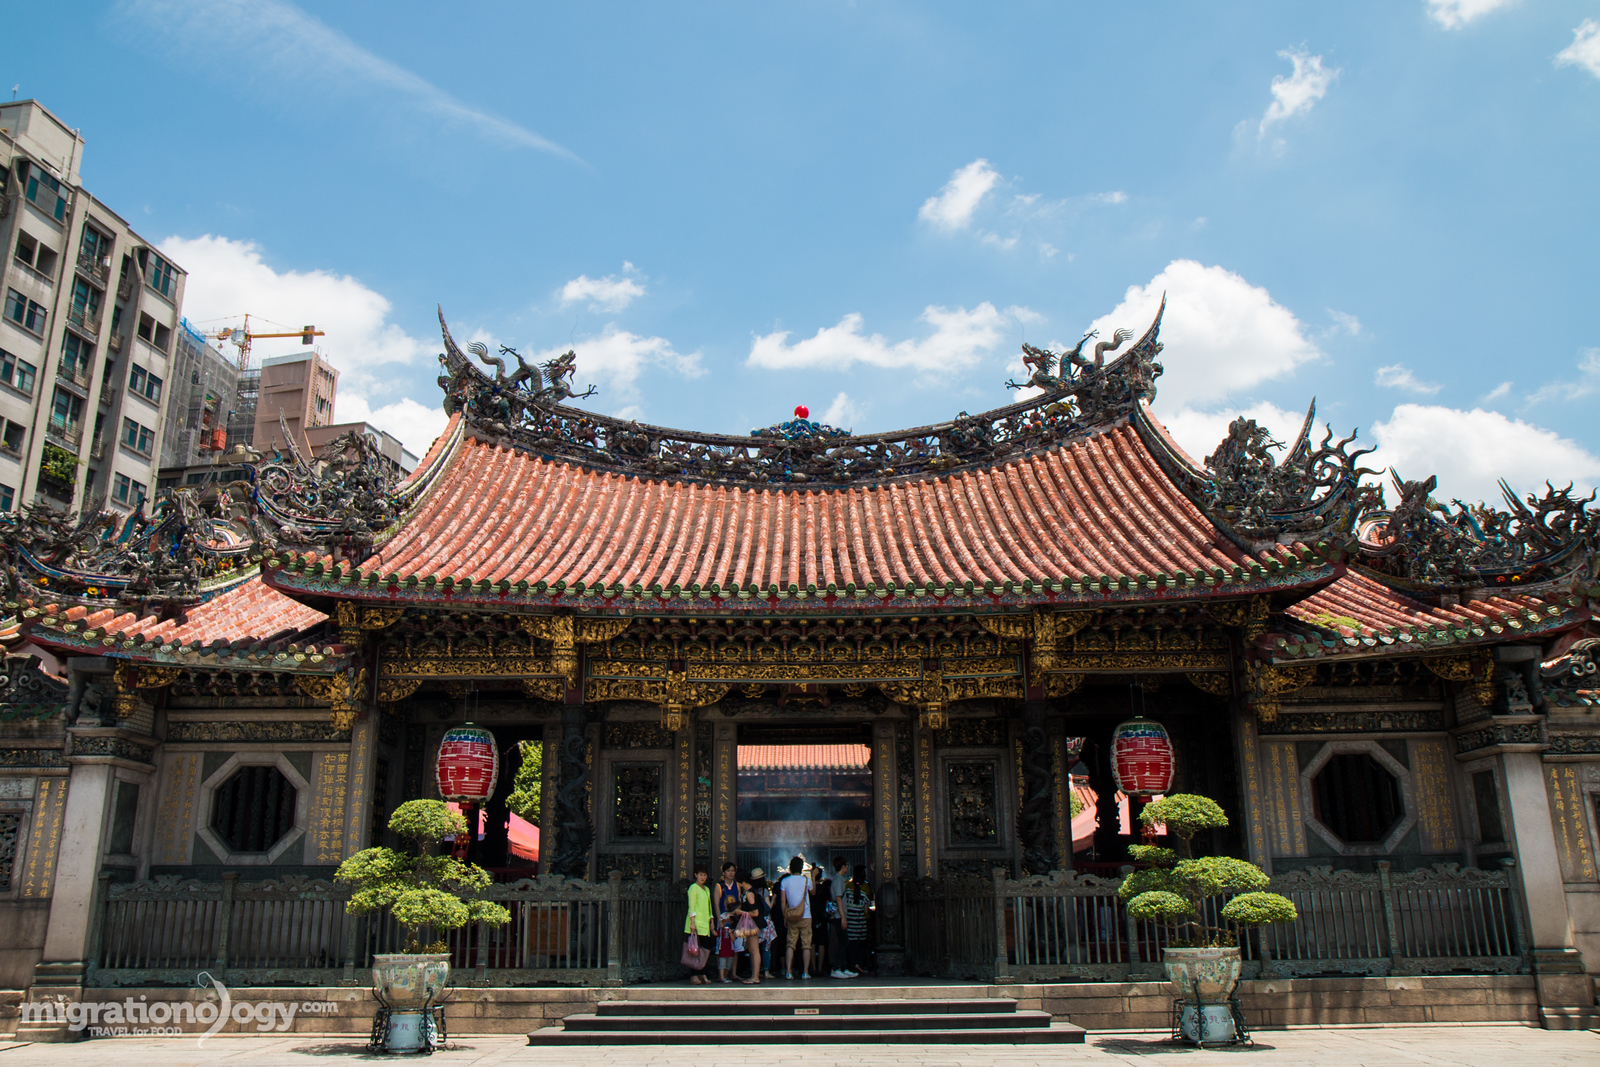
Things to do in Taipei – Longshan Temple
Things to do in Taipei
When my wife and I were in Taipei, we were on a mission to do quite a lot, and so along with eating, we ran around visiting many attractions in-between meals.
Here are some of the top things to do in Taipei, when you’re taking a break from the food!
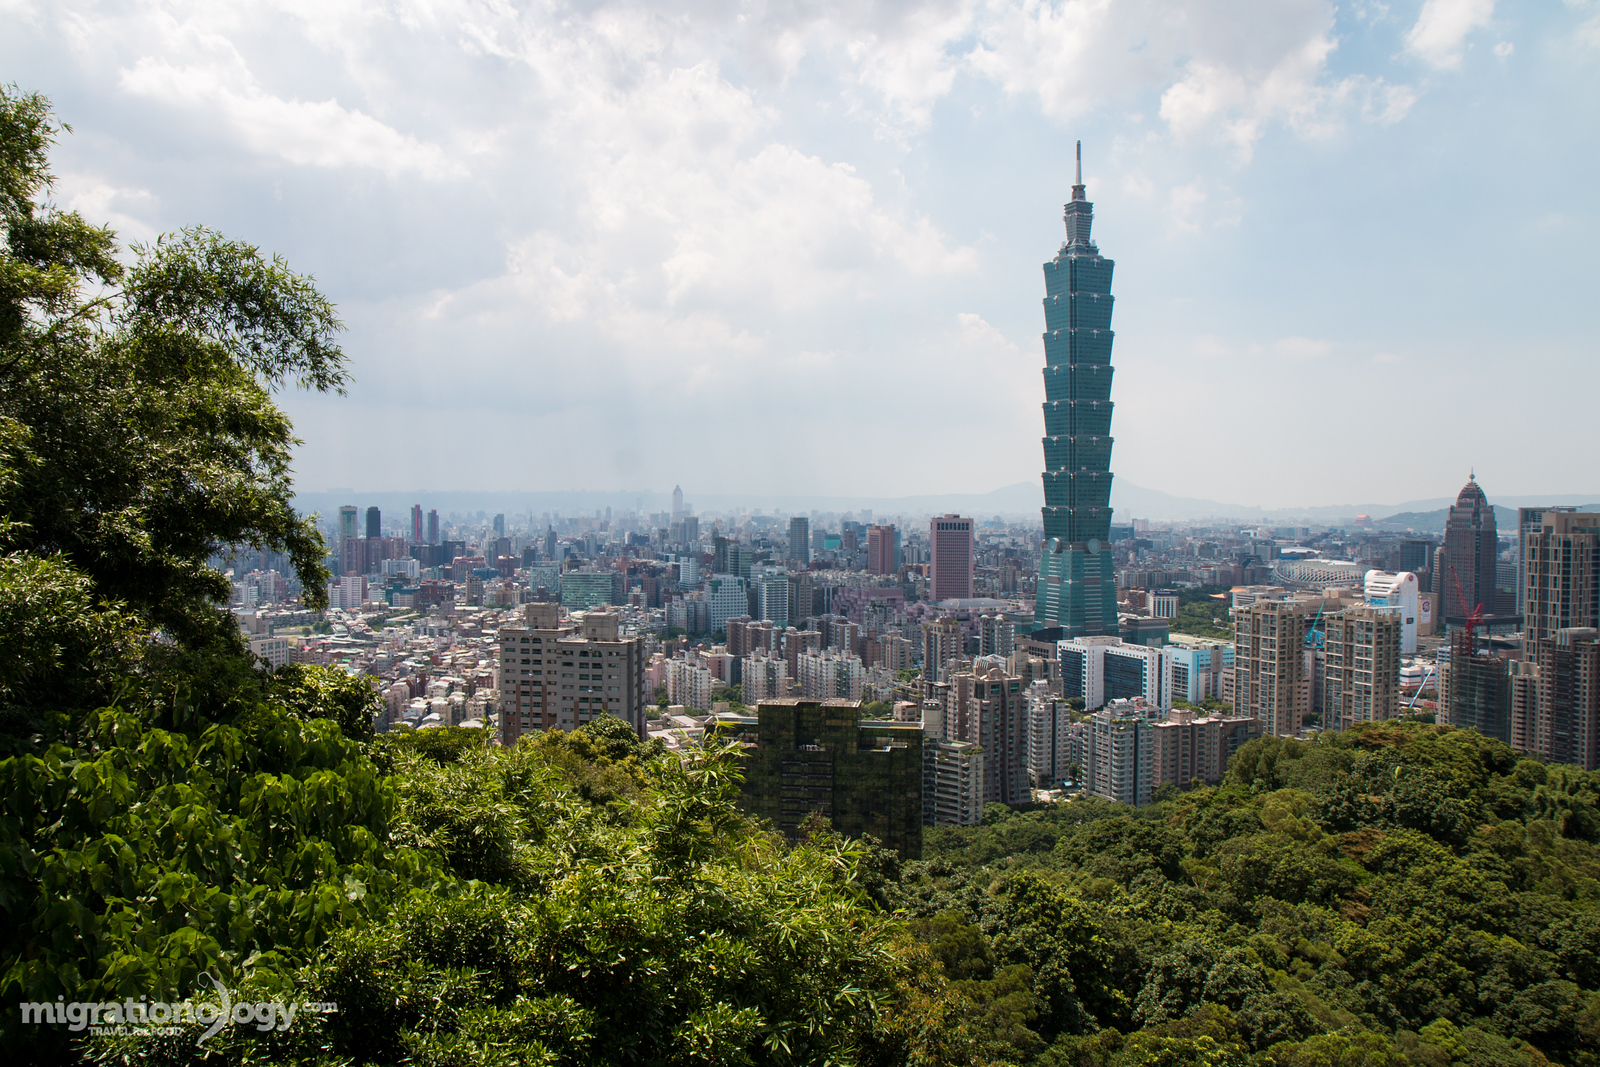
Taipei 101 Observatory – Designed to look like a pole of bamboo, Taipei 101 is the tallest and most iconic landmark skyscraper of Taipei. At the bottom of the monstrous tower is a giant luxury mall, but the main attraction is the observatory from the 88th – 91st floors. It is a little pricey at 500 NTW entrance for adults, but it truly is a breathtaking view of the city. I spent about an hour at the observatory, admiring Taipei from all directions. Conveniently located on ground floor, as soon as you get out of the elevator is Din Tai Fung, and it’s kind of a rite of passage to have xiaolongbao after finishing at the observation deck… at least I think so. Address: 110, Taiwan, Taipei City, Xinyi District, Section 5, Xinyi Rd, 7號; Opening hours: 9 am – 10 pm daily; Entrance price: 600 TWD for adults.
Elephant Mountain – Just like Hong Kong, Taipei is not only an incredible city, but it’s surrounded by lush green mountains. Right in the middle of the city is a place called Elephant Mountain, where you can take a hike, and in literally just a few minutes, you feel like you’re in middle of the jungle rather than in a huge city. The main trail leads to a series of views of Taipei, with an amazing view of Taipei 101 and the entire downtown area of Taipei. Another great thing is that you can take a little hike at Elephant Mountain even if you just have an hour or two to spare. Address: 110, Taiwan, Taipei City, Xinyi District; Opening hours: 9 am – 5 pm daily; Entrance price: it’s free to enter as it’s a memorial.
Chiang Kai-shek Memorial Hall – The Chiang Kai-shek Memorial Hall is a gigantic memorial landmark in Taipei, dedicated to Chiang Kai-shek, a former leader of the Republic of China. The overall structure and courtyard that it’s part of is gigantic. And also one of the main attractions at the hall is watching the elaborate changing of the guard ceremony which happens every hour on the hour. Address: No. 21, Zhongshan S Rd, Zhongzheng District, Taipei City, Taiwan 100; Opening hours: daylight hours; Entrance price: this is a free attraction.
Longshan Temple – Fully known as Mengjia Longshan Temple, the temple is one of the most important Chinese temple in Taipei, and considered to be a national treasure of history and cultural heritage. When I visited, the temple was packed full of people both inside and out, and the entire temple seemed to be going up in a cloud of incense smoke and scurrying people. The environment was very lively yet calm at the same time. Address: No. 211, Guangzhou St, Wanhua District, Taipei City, Taiwan 10853; Opening hours: 6 am – 10 pm daily; Entrance price: it’s free to enter as it’s a temple.
Dalongdong Baoan Temple – In short just known as Baoan temple, this small incredibly well preserved and ornate temple, is another cultural Taiwanese heritage icon. Of all the temples I visited in my trip to Taipei, this was probably the most impressive for its incredibly detailed decorations and paintings. Also, in contrast to the lively action of Longshan Temple, Baoan Temple was extremely quiet and peaceful. Address: No. 61, Hami St, Datong District, Taipei City, Taiwan 103; Opening hours: 7 am – 10 pm daily; Entrance price: free.
National Palace Museum – I’m not huge on museums when I travel, but sometimes I do enjoy visiting, and the National Palace Museum was what I considered to be a museum that’s worth the time and entrance fee – largely due to its important collection. According to Wikipedia, the museum includes 696,000 pieces, making it one of the largest museums in the world, mostly focusing on Chinese history and art. When I was in University I took a number of art history courses, and I remember studying some of the most famous masterpieces on display at the museum – pieces by artists like Fan Kuan and Zhang Zeduan. If you love art and Chinese history the National Palace is a museum you have to visit in Taipei. Address: No. 221, Section 2, Zhishan Rd, Shilin District, Taipei City, Taiwan 111; Opening hours: 8:30 am – 6:30 pm on Sunday – Thursday and 8:30 am – 9 pm on Friday and Saturday; Entrance price: 250 TWD.
Night Markets – I’ve already covered this above, but it’s worth adding it to the attractions list as well, since night markets are such an important part of Taiwanese culture. Of all the attractions within this Taipei travel guide, visiting night markets is one of my favorites. You simply don’t go to Taipei without going to a night market a few times, or even every night you’re up for it. They are fun, entertaining, provide a cultural Taiwanese experience, and the greatest bonus is that you’ll find a never ending variety of delicious food to eat.
Maokong Gondola – I thought it was going to be a little short gondola ride, but the ride is actually a means of both transportation (connected to the mass transit system) and a touristy attraction. The entire Maokong Gondola ride takes about 30 minutes, offers incredible views, and when you reach the top there are tea houses in the mountains. The only setback is that the gondola closes if there’s rainy weather and sometimes there can be a pretty long line. But it’s very affordable and a great thing to do. Address: At Taipei Zoo station – 116, Taiwan, Taipei City, Wenshan District; Opening hours: 9 am – 9 pm on Tuesday – Thursday, 9 am – 10 pm on Friday, 8:30 am – 10 pm on Saturday, and 8:30 – 9 pm on Sunday, hours are also subject to change due to festival, events, and weather; Entrance price: They have a variety of different ticket options, but a single ticket costs 120 TWD.
Lin Family Mansion and Garden – One of the things I wasn’t sure if I was going to have time to do, but I’m very happy I did, is visit the Lin Family Mansion and Garden, a privately opened house and museum. Walking around the ancient and well designed gardens was a true throwback in time. It was both peaceful and eerie. Address: No. 9, Ximen St, Banqiao District, New Taipei City, Taiwan 220; Opening hours: 9 am – 5 pm daily, but close on the 1st Monday of each month; Entrance price: This is one of the best free attractions in Taipei.
Beitou hot springs area – When you arrive to Beitou, a hot spring mountainous resort area, it’s hard to believe you’re still right in Taipei. The area has a completely different countryside feel to it, and it’s most famous for the hot springs which can be accessed from both hotels and a public bathing facility. Additionally in the area you’ll find restaurants and other attractions that you can easily visit in a hale or full Taipei day trip. Address: Beitou Station – No. 1, Guangming Rd, Beitou District, Taipei City, Taiwan 11246; Opening hours: Most things are open 9 am – 5 pm daily, but some museums close on Mondays (so best to not go on a Monday if possible); Entrance price: Depending on what you do, there are some free attractions, but to enter the public hot springs it costs 40 TWD per person.
There are many more things to do in Taipei, but I included just a concise list of my personal favorite attractions within this Taipei travel guide.
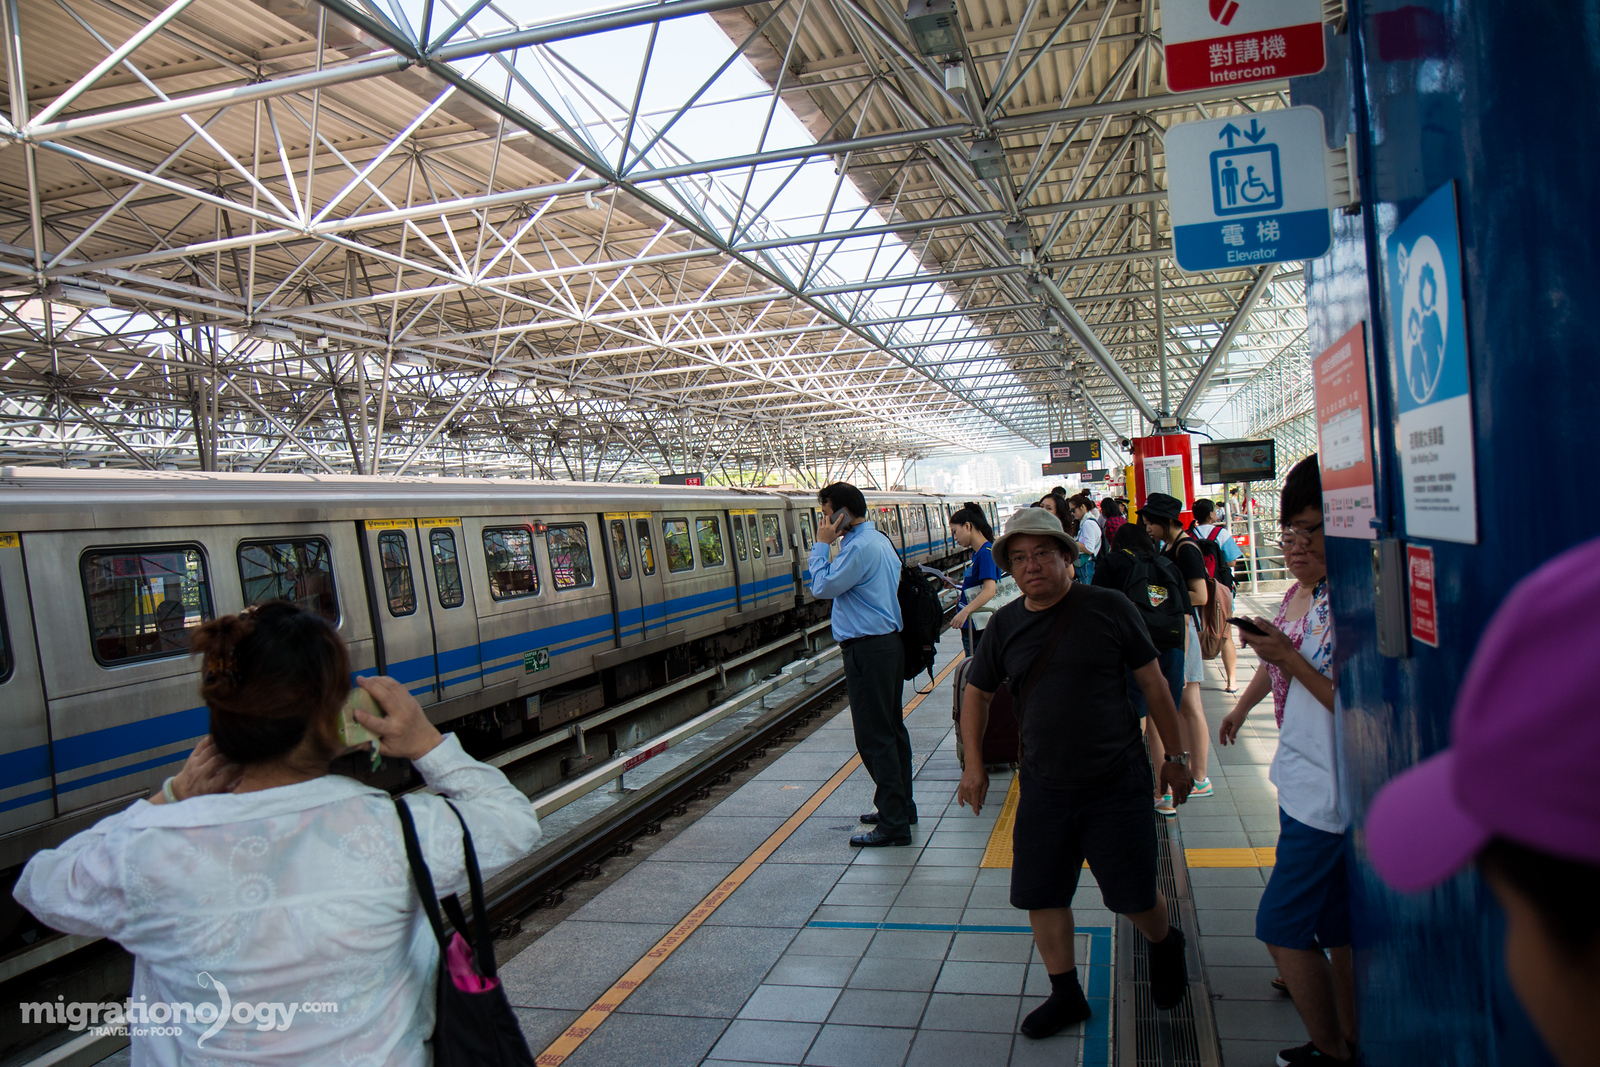
Local transportation in Taipei
How to get around (transportation)
Taipei has one of the best, most convenient, and most clean and modern mass transportation systems in Asia. And another great thing is that it’s somehow never extremely crowded (very well managed) and it’s hassle free.
Pair the MRT with the great bus system as well, and Taipei has wonderful public transportation. For my entire trip to Taipei, I didn’t ever use a taxi, but relied completely on the Metro and bus.
Metro – The Metro Taipei is extremely nice and convenient, and very affordable as well. You have a couple of options, depending on how long you’re in Taipei and how much you’ll be running around. A one day pass, including unlimited rides costs 150 TWD ($4.59). But if you’re in Taipei for a few days, I’d recommend purchasing an Easy Card, which you can purchase at any station, which allows you to add money so you can just touch and go. Rides on the Metro vary in price depending on distance and can range from 16 TWD – 55 TWD ($0.49 – $1.68). It’s very affordable.
Bus – The bus system is also very easy to use if you know which bus to take. And to pay you can use your same Easy Card and just tap in.
Taipei skyline from Elephant Mountain
Prices and expenses
I would say that Taipei is a mid to low priced range travel destination, and I think that overall the value for money in Taipei is excellent.
Accommodation:
Hostel: $10 – $25 USD per bed
Mid-range hotel: $25 – $75 USD per night
High end: Everything above $75 USD
Transportation:
Metro ride: Depending on how far you go, about 16 TWD – 55 TWD ($0.49 – $1.68)
Bus ride: Also depending on how far you go buy similar prices to the Metro
Taxi: Even taxis are not too high in price, and if you need to take one, they are very reliable option. The only reason I didn’t take a taxi in Taipei is just because the public transportation is so adequate if you can walk a little bit. For a taxi ride about a 10 kilometer ride should cost somewhere around 250 TWD – 300 TWD ($7.65 – $9.17).
Rice and side dishes (local style meal): 100 – 200 TWD per person ($3.06 – $6.12)
Local hot pot meal: 250 TWD per person ($7.64)
Nicer indoor restaurant: About 300 – 600 TWD per person ($9.17 – $18.35)
Bubble tea: 35 NTW ($1.07)
This is just an estimate of prices that I took note of while visiting and writing this Taipei travel guide. So it’s meant to just be a rough guide to give you an idea of prices and expenses you can expect.
Taipei travel guide videos
During my trip to Taipei, I decided to make a Taipei travel guide video blog for every day I was in Taipei.
So this series of videos covers all 12 days that we stayed in Taipei, including our full travel and food itinerary that we did each day. There are also a few extra Taiwanese food videos in the playlist at the end.
You can watch the full video series on YouTube here.
Map of Taipei
On this map (if you can’t see it above, here’s the direct link), you’ll find all the attractions and restaurants listed in this Taipei travel guide. One of the ways I plan my daily itineraries is by studying a map of attractions and restaurants. So I hope this will be helpful for you.
Taipei Travel Guide for Food Lovers
Conclusion
Taipei is the capital and largest city of Taiwan, offering a wealth of shopping, art, culture, history, and most importantly food.
One of the reasons I was most excited to visit Taipei was to explore the famous night markets, and with an almost incomprehensible quantity and variety of different food stalls to choose from, and they didn’t disappoint.
Taipei is an extremely modern, convenient, and even very friendly travel destination. You’ll love the mix of modern culture and ancient history, the contrast of skyscrapers and lush green parks and mountains, and the variety of Taiwanese and Chinese food you can eat.
Taipei has a lot going for it, and if you love to eat, you’re going to enjoy Taipei.
Thank you for reading this Taipei travel guide, and I hope it will assist you in planning your trip to Taipei.
Have you been to Taipei? Are you planning to visit?
Enter your email & I'll send you the best food updates