Lima is a wonderful city – people are friendly and hospitable, there’s plenty of things to do and see, huge local markets, and an abundance of extraordinary Peruvian food.
I loved visiting Lima, and here’s a short list of the best restaurants in Lima that I tried, and that are included (most of them) in my Peru video series.
Restaurants
Caldo Cesar
Address: Jirón Sebastián Barranca 1852, Cercado de Lima 15018, Peru
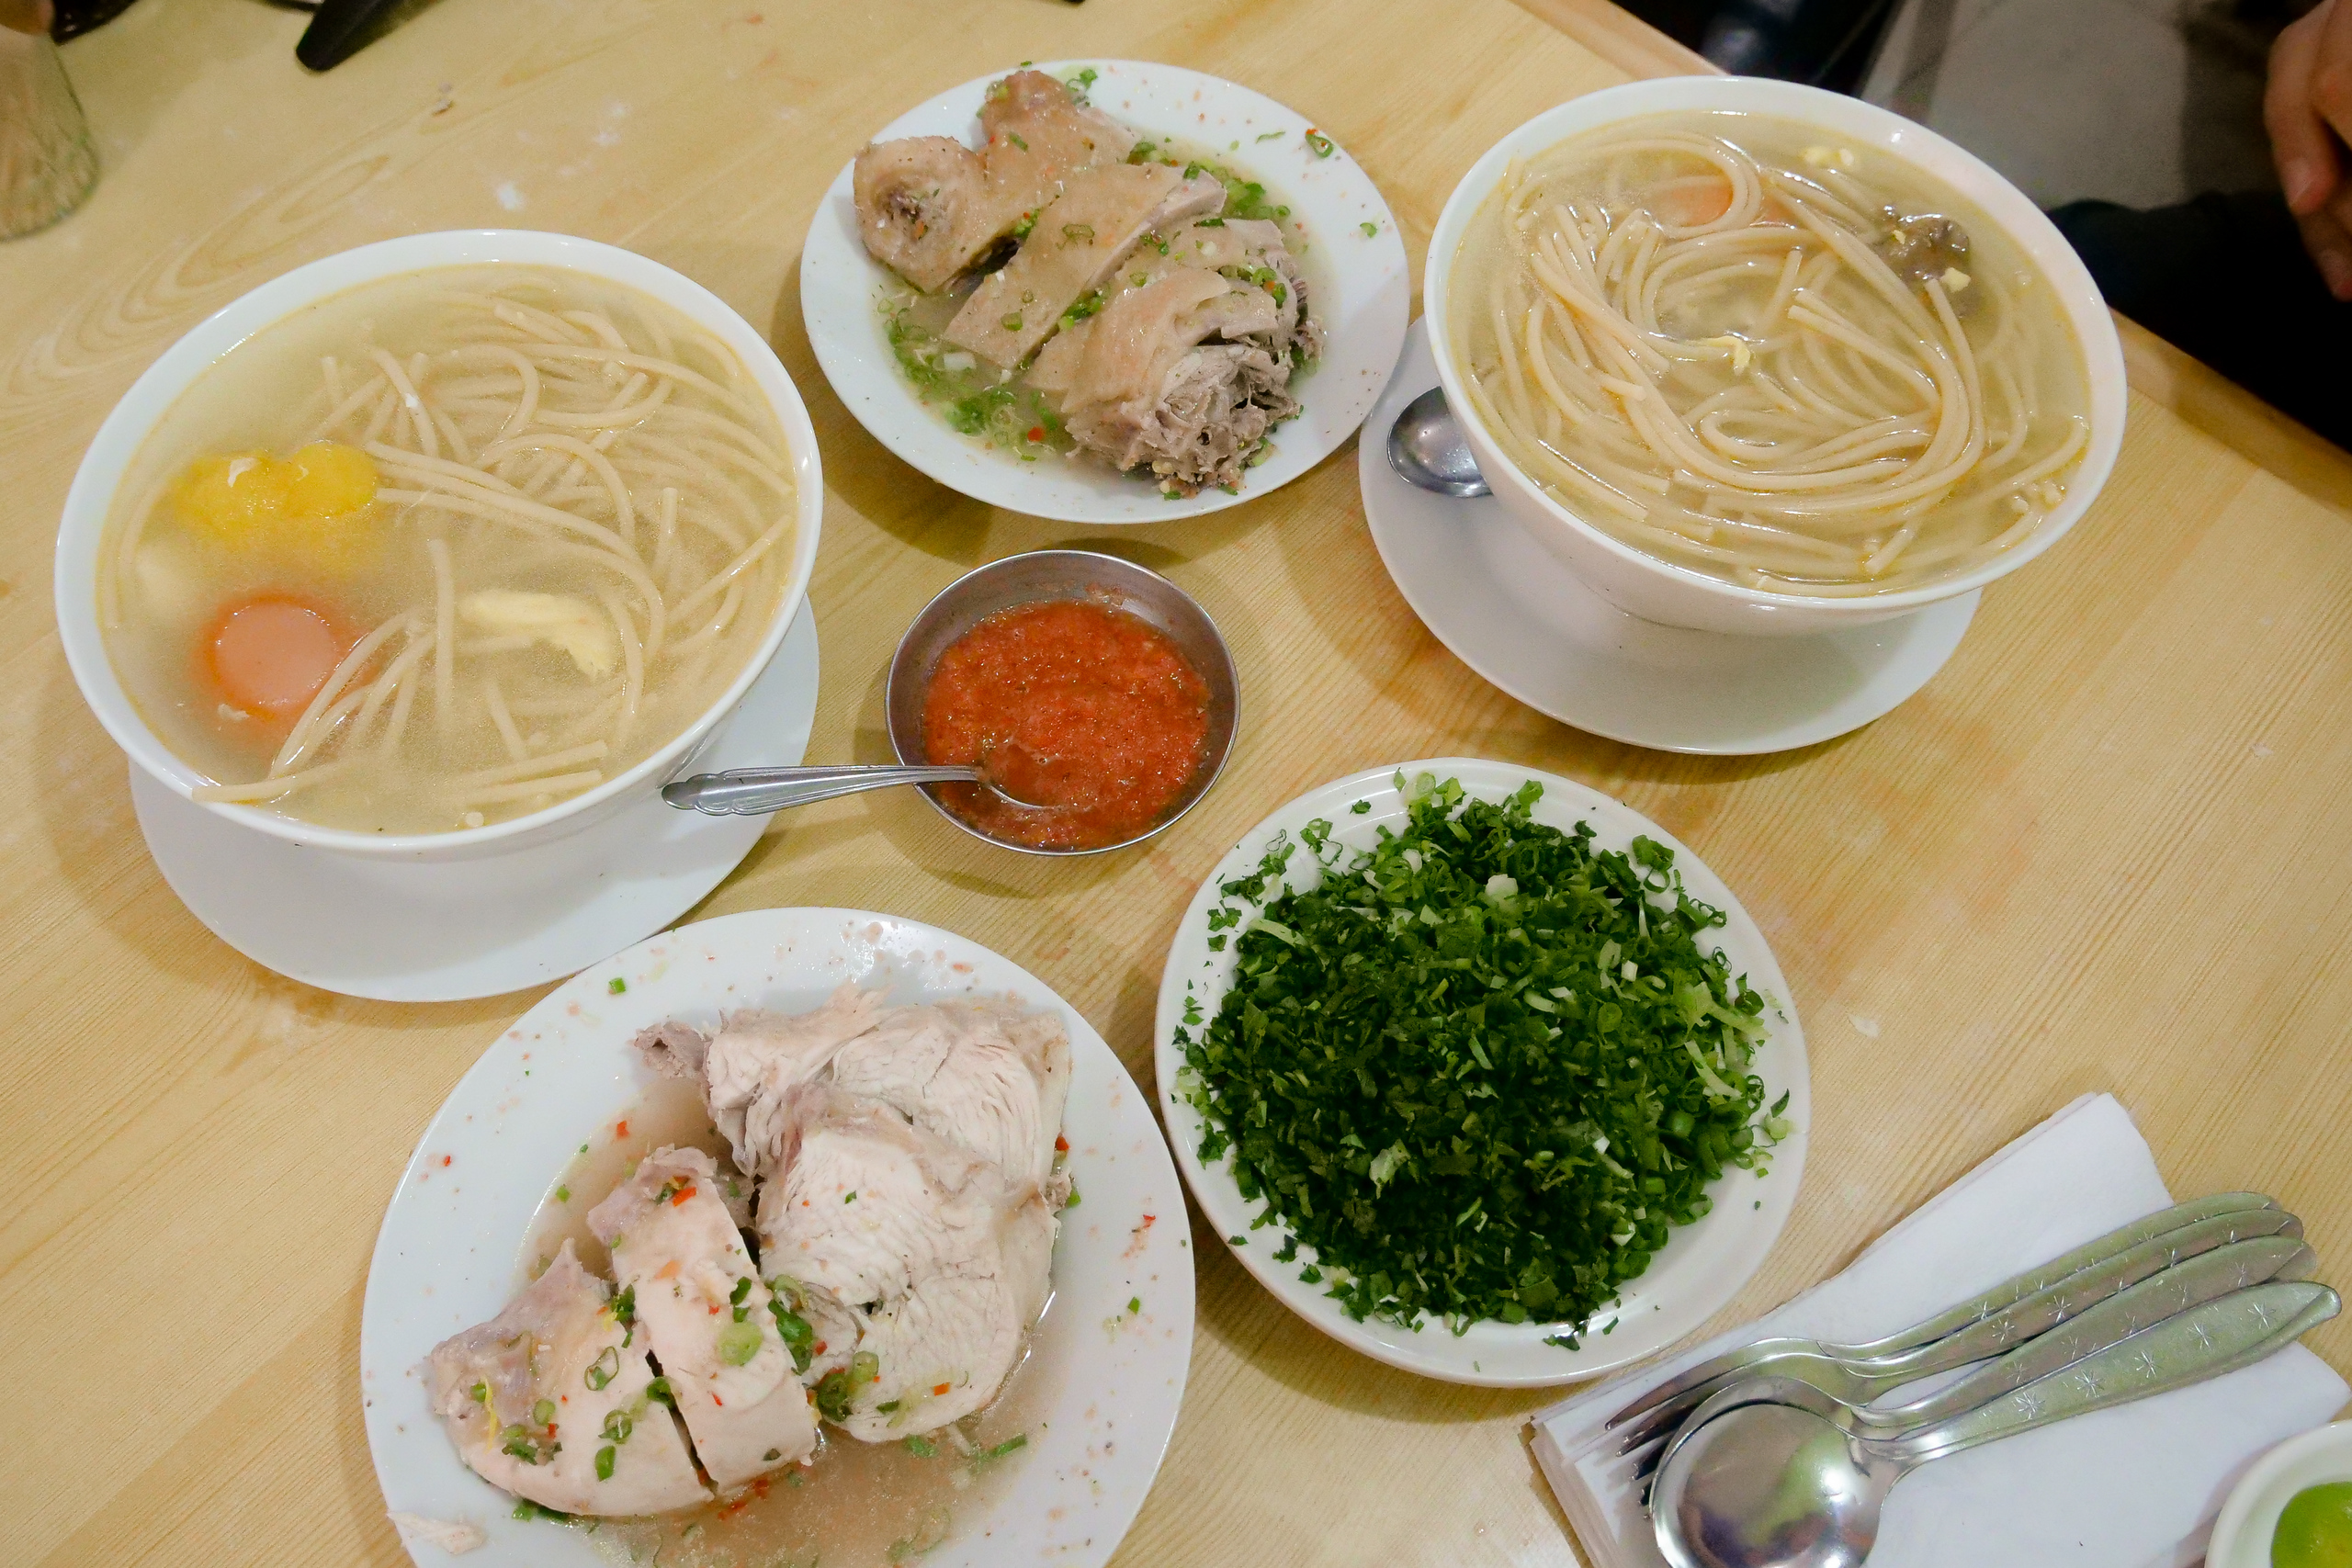
Mark Wiens ate: Caldo de Gallina – extremely popular place to eat this delicious Peruvian chicken (hen) soup with noodles, and separate plates of chicken and sauce.
Notes: Thanks to Acomer.pe for taking us here.
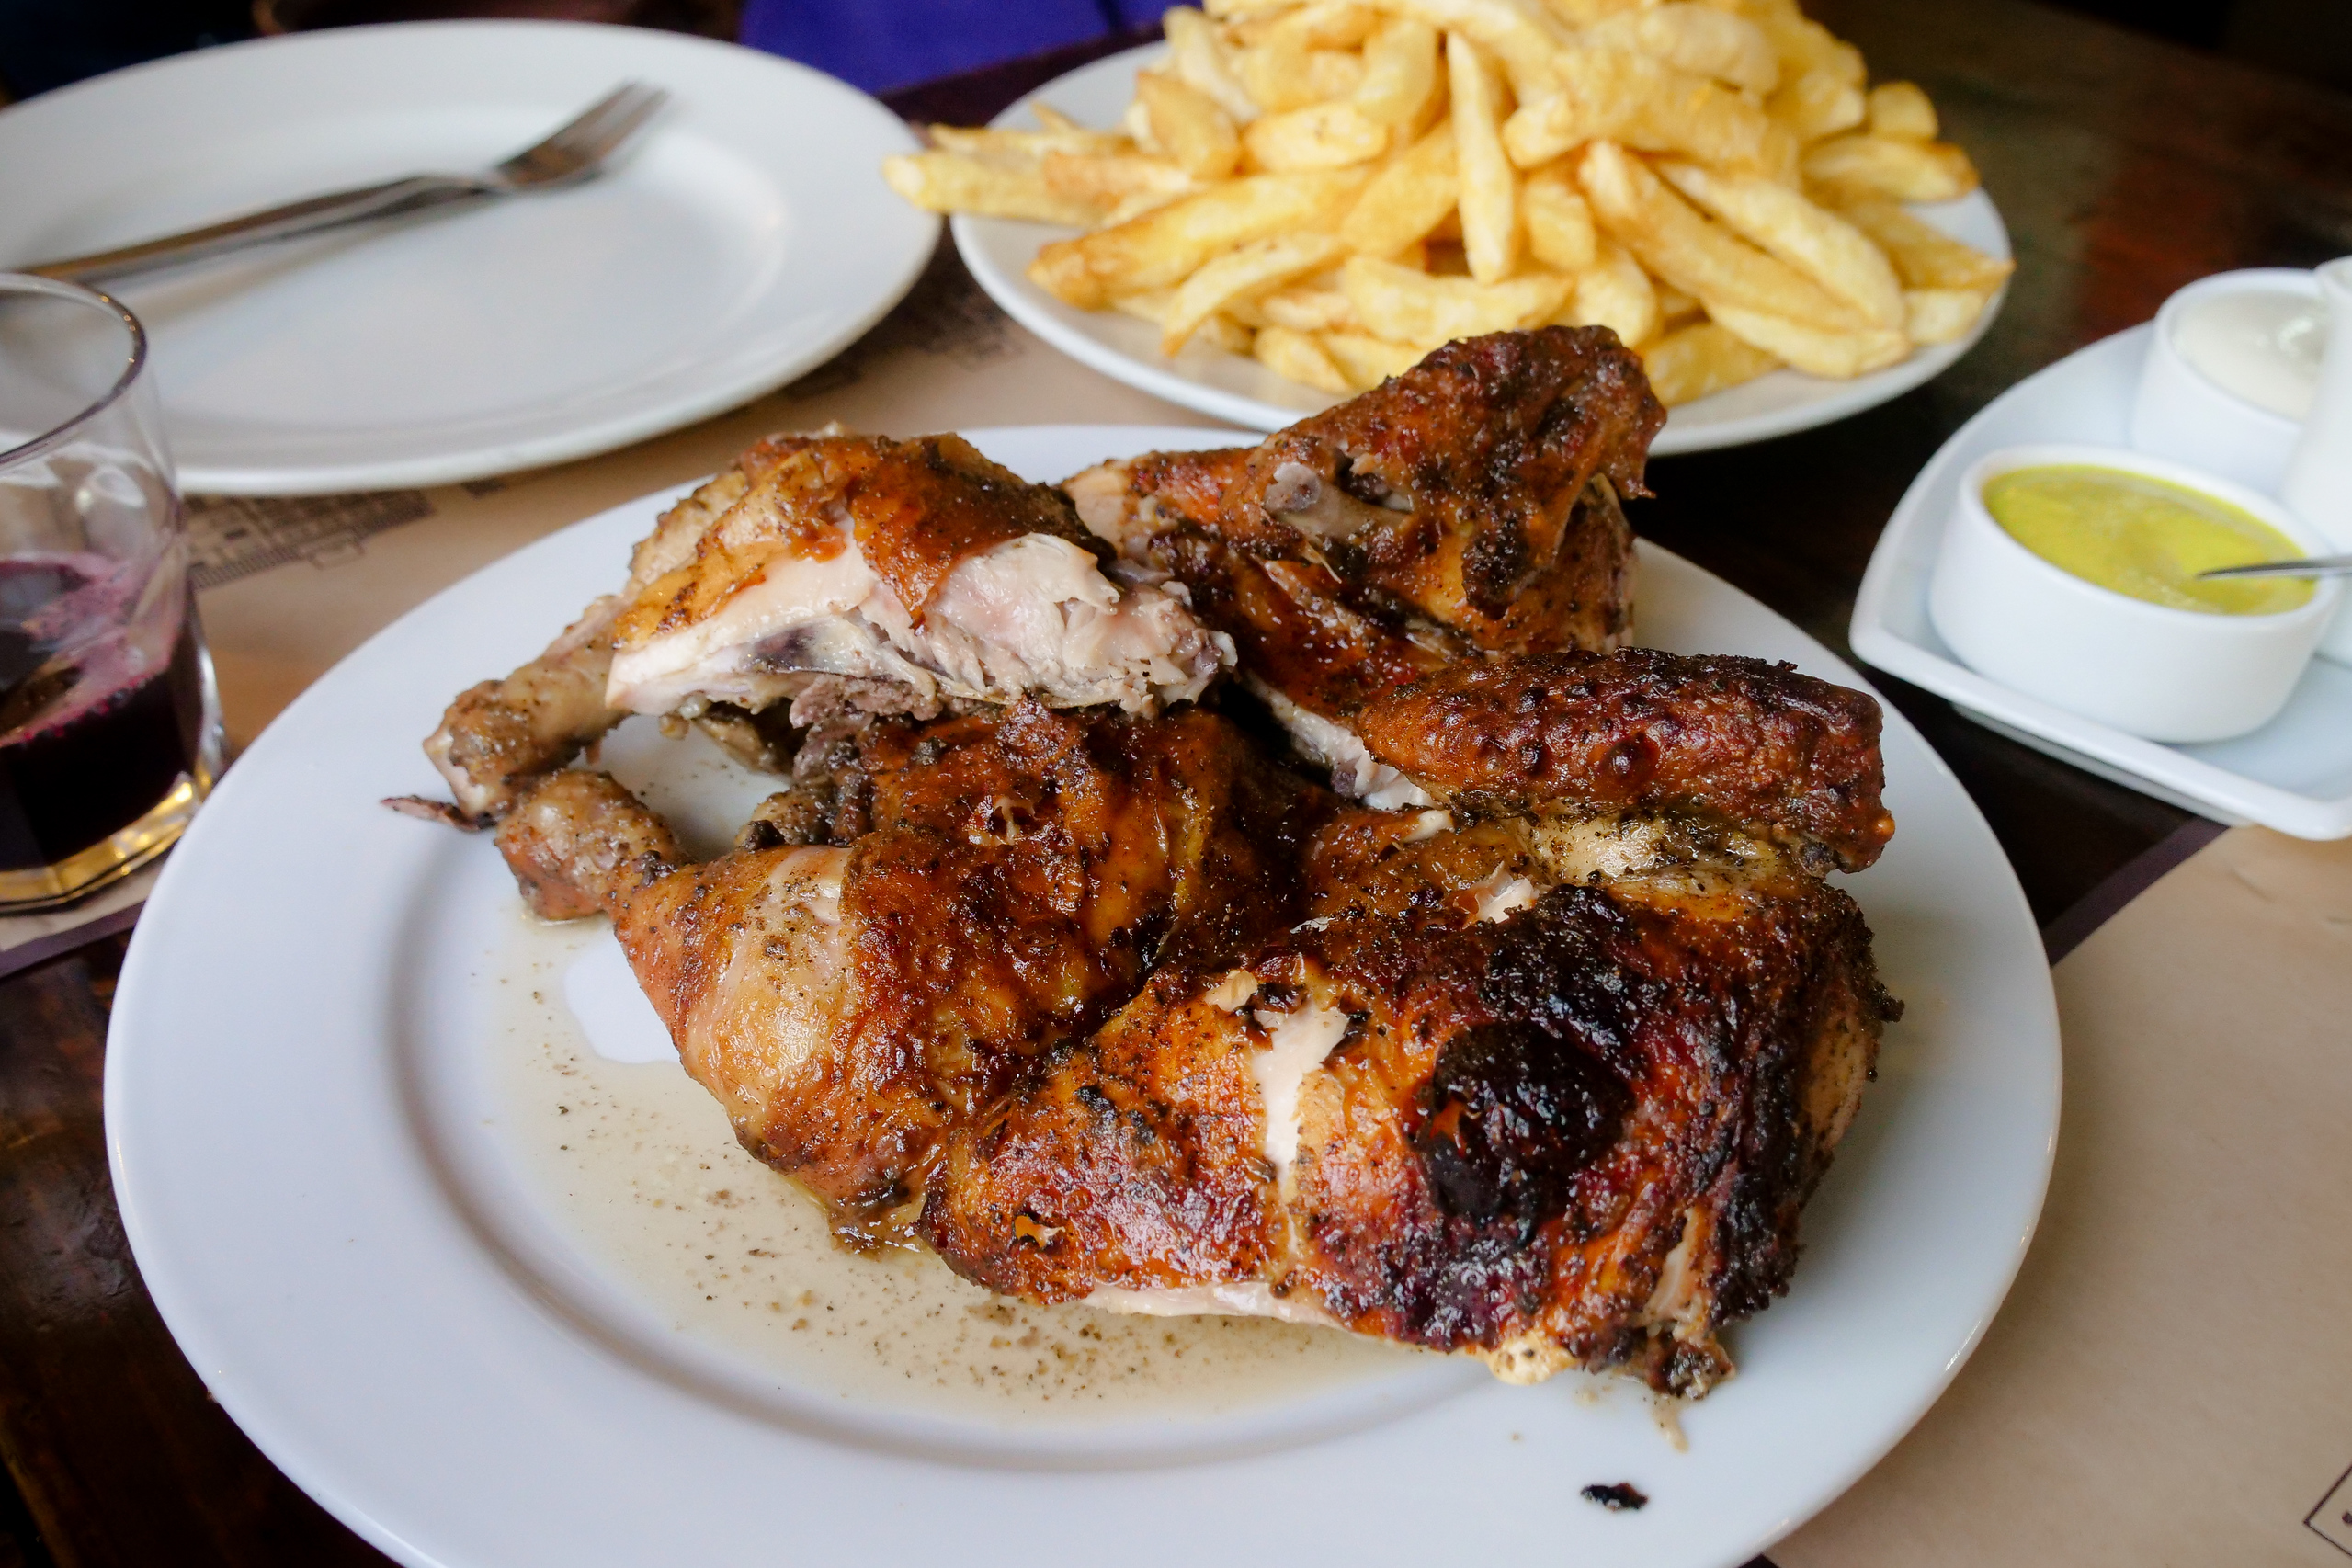
Don Tito – Pollo A La Brasa
Address: Av. Aviación 3096, San Borja 15036, Peru
Mark Wiens ate: Pollo a la brasa – classic Peruvian roast chicken, and their fries are also delicious. Very nice family restaurant and the place to eat pollo a la brasa.
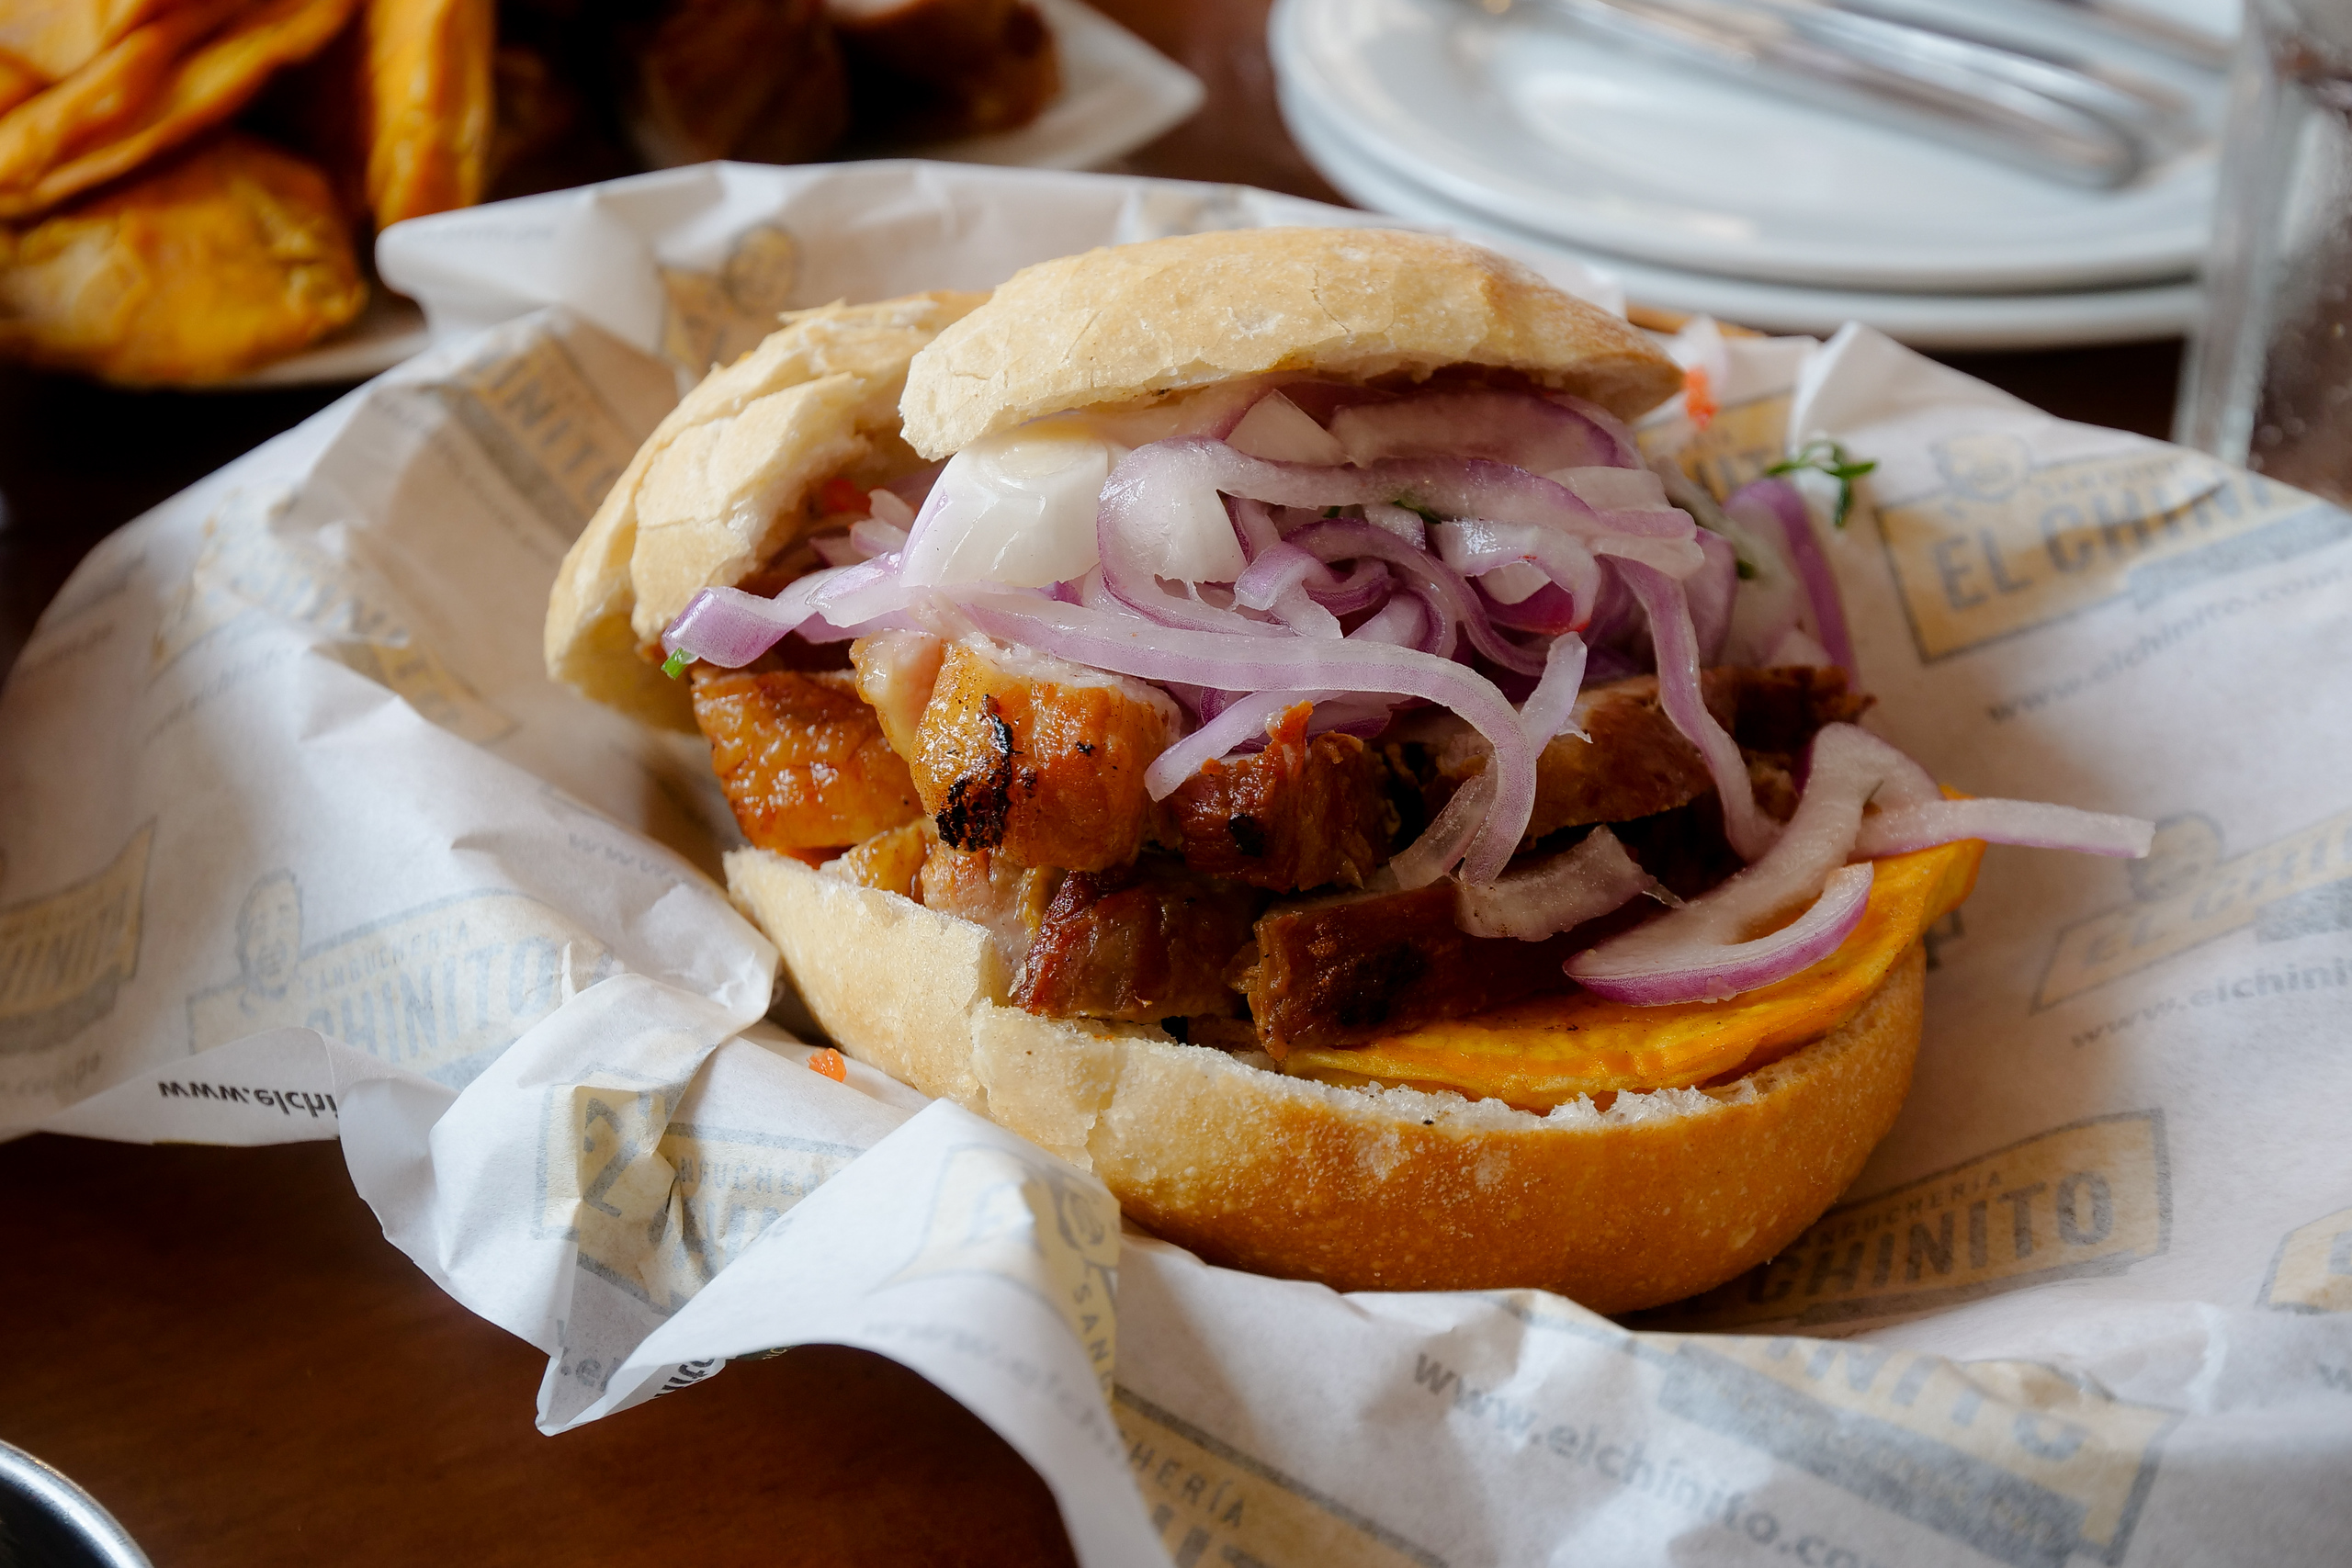
Sangucheria El Chinito
Address: Jirón Carabaya 303, Cercado de Lima 15001, Peru
Mark ate: Chicharron sandwich with sweet potato, it’s so good, the pork just melts in your mouth with a crispy edge. Also try their pork ribs with fried sweet potato (Costillitas del Chinito), and their fried rice was surprisingly tasty (Chaufarroncito).
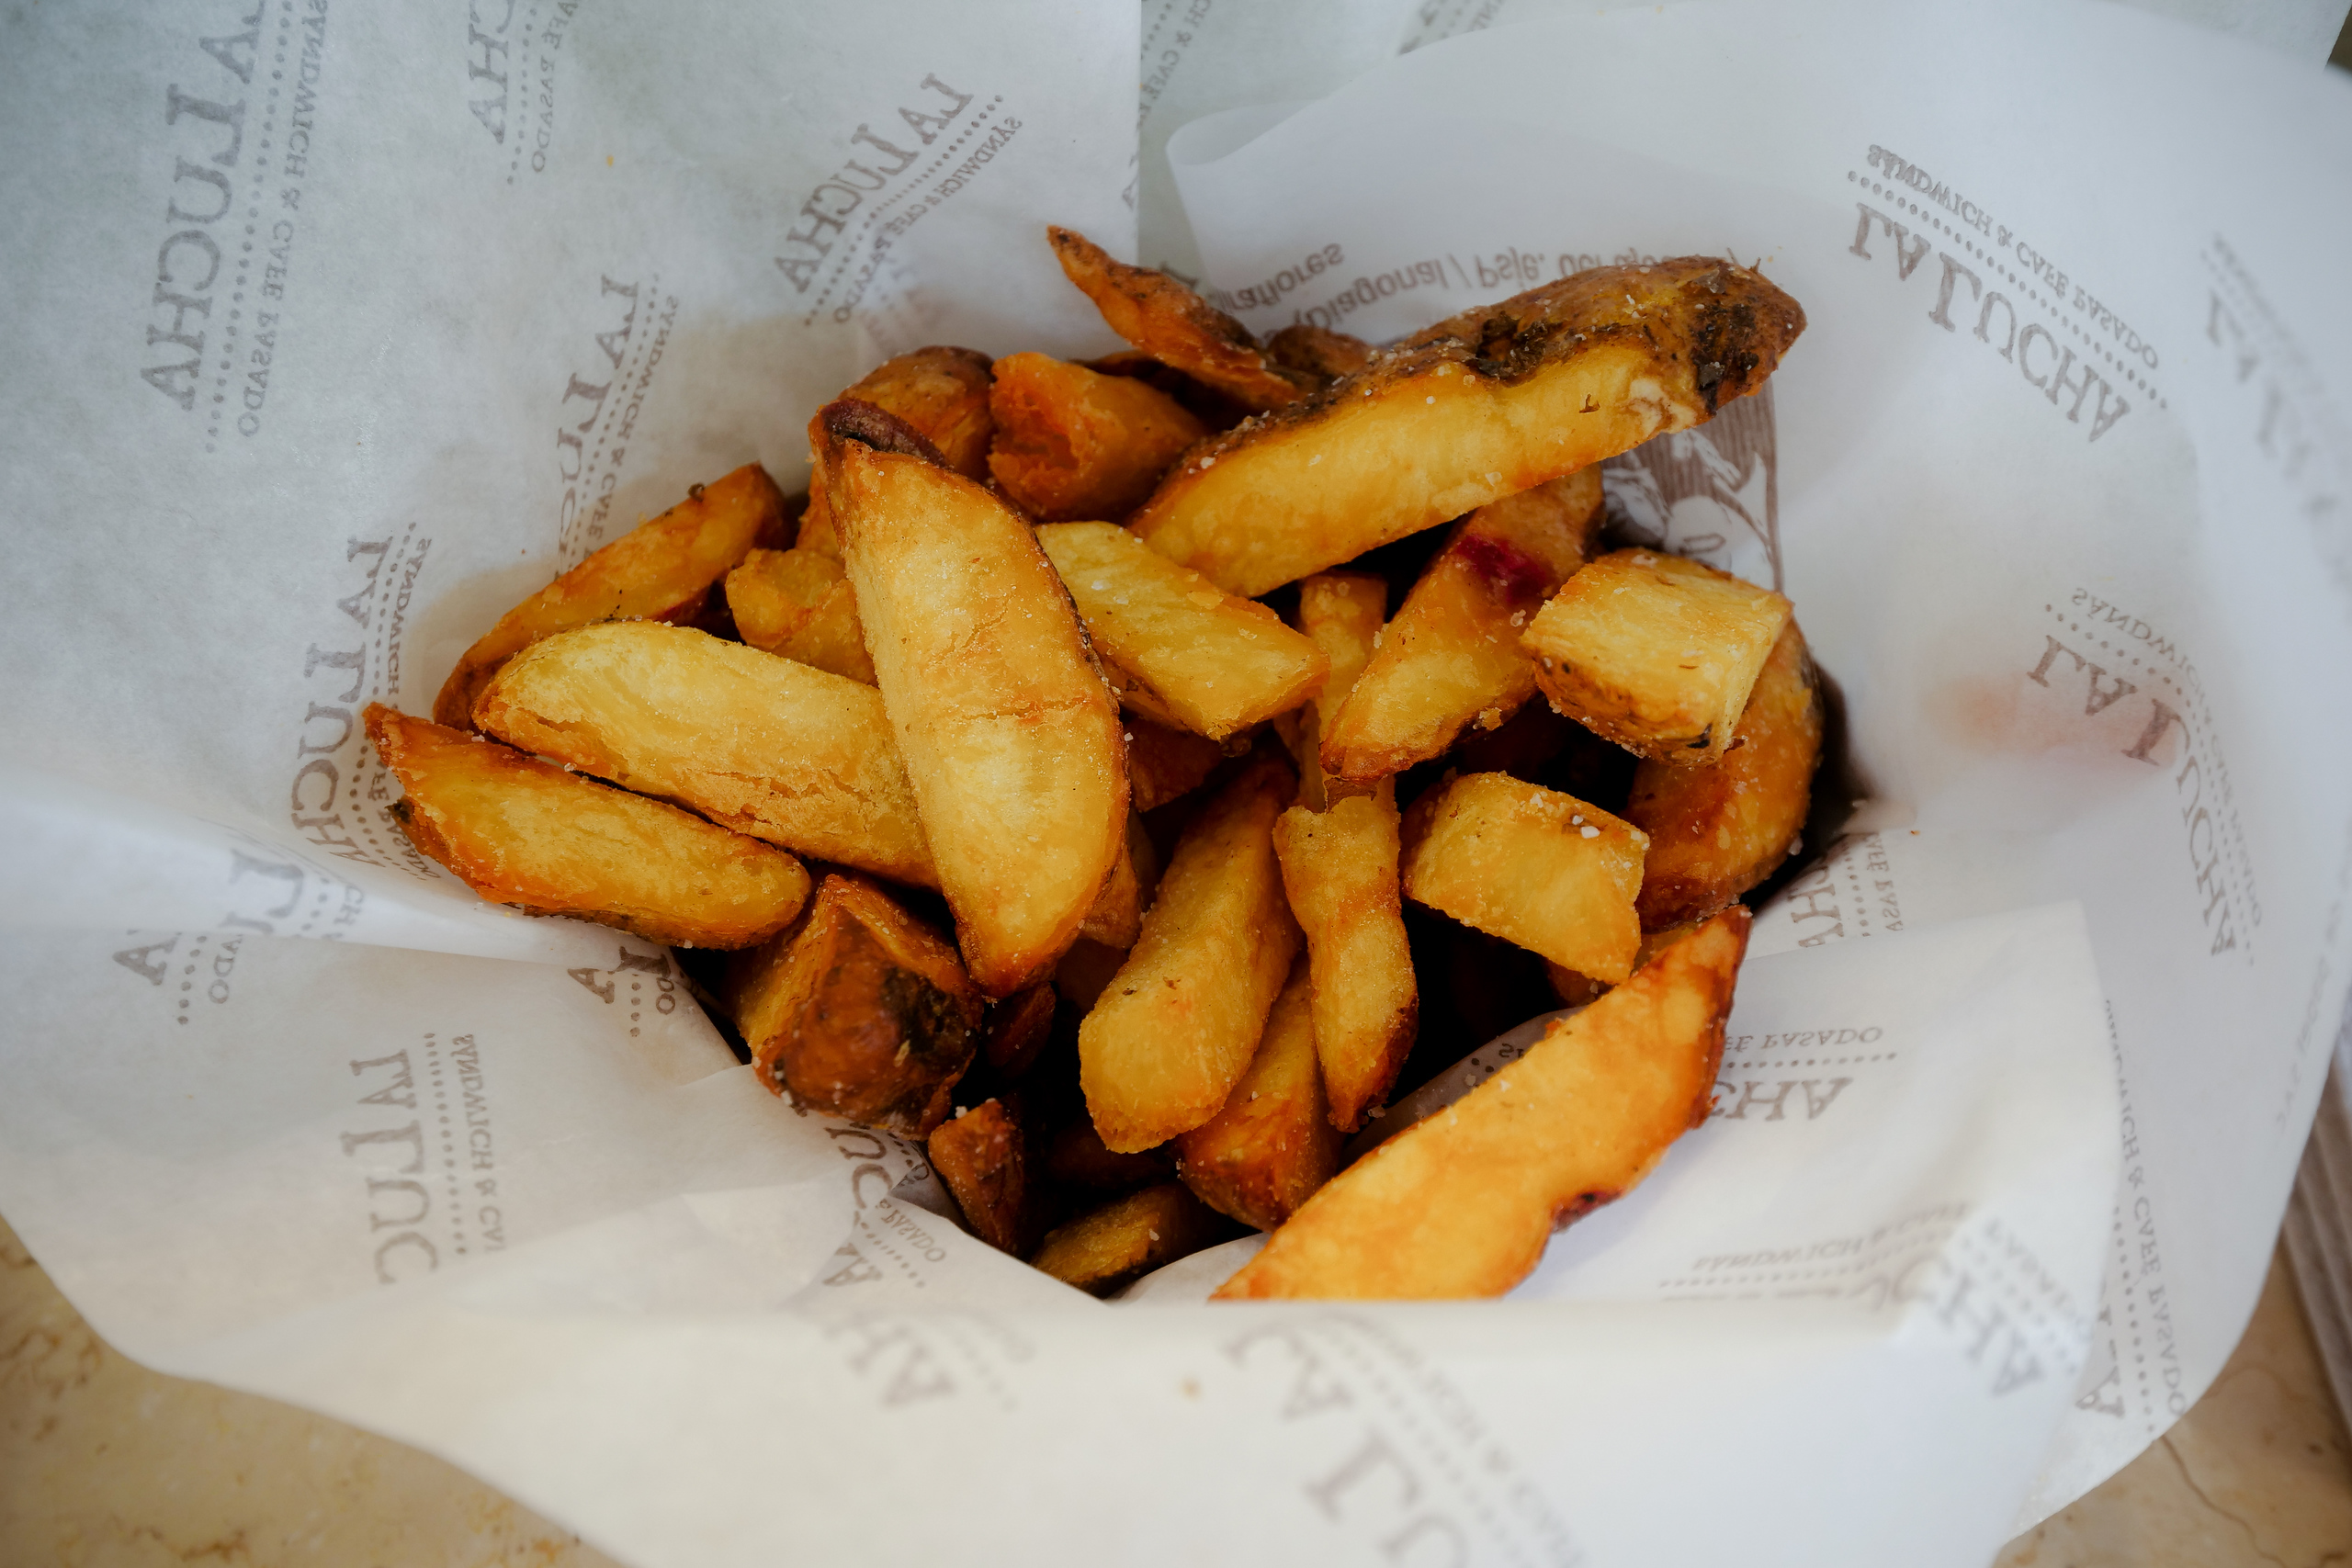
La Lucha
Address: Pje Champagnat 201, Miraflores 15074, Peru
Mark Wiens ate: Fries – some of the best you’ll have anywhere on earth, and their chicharron (fried pork) sandwich stuffed with pickled onions is something to rave about.
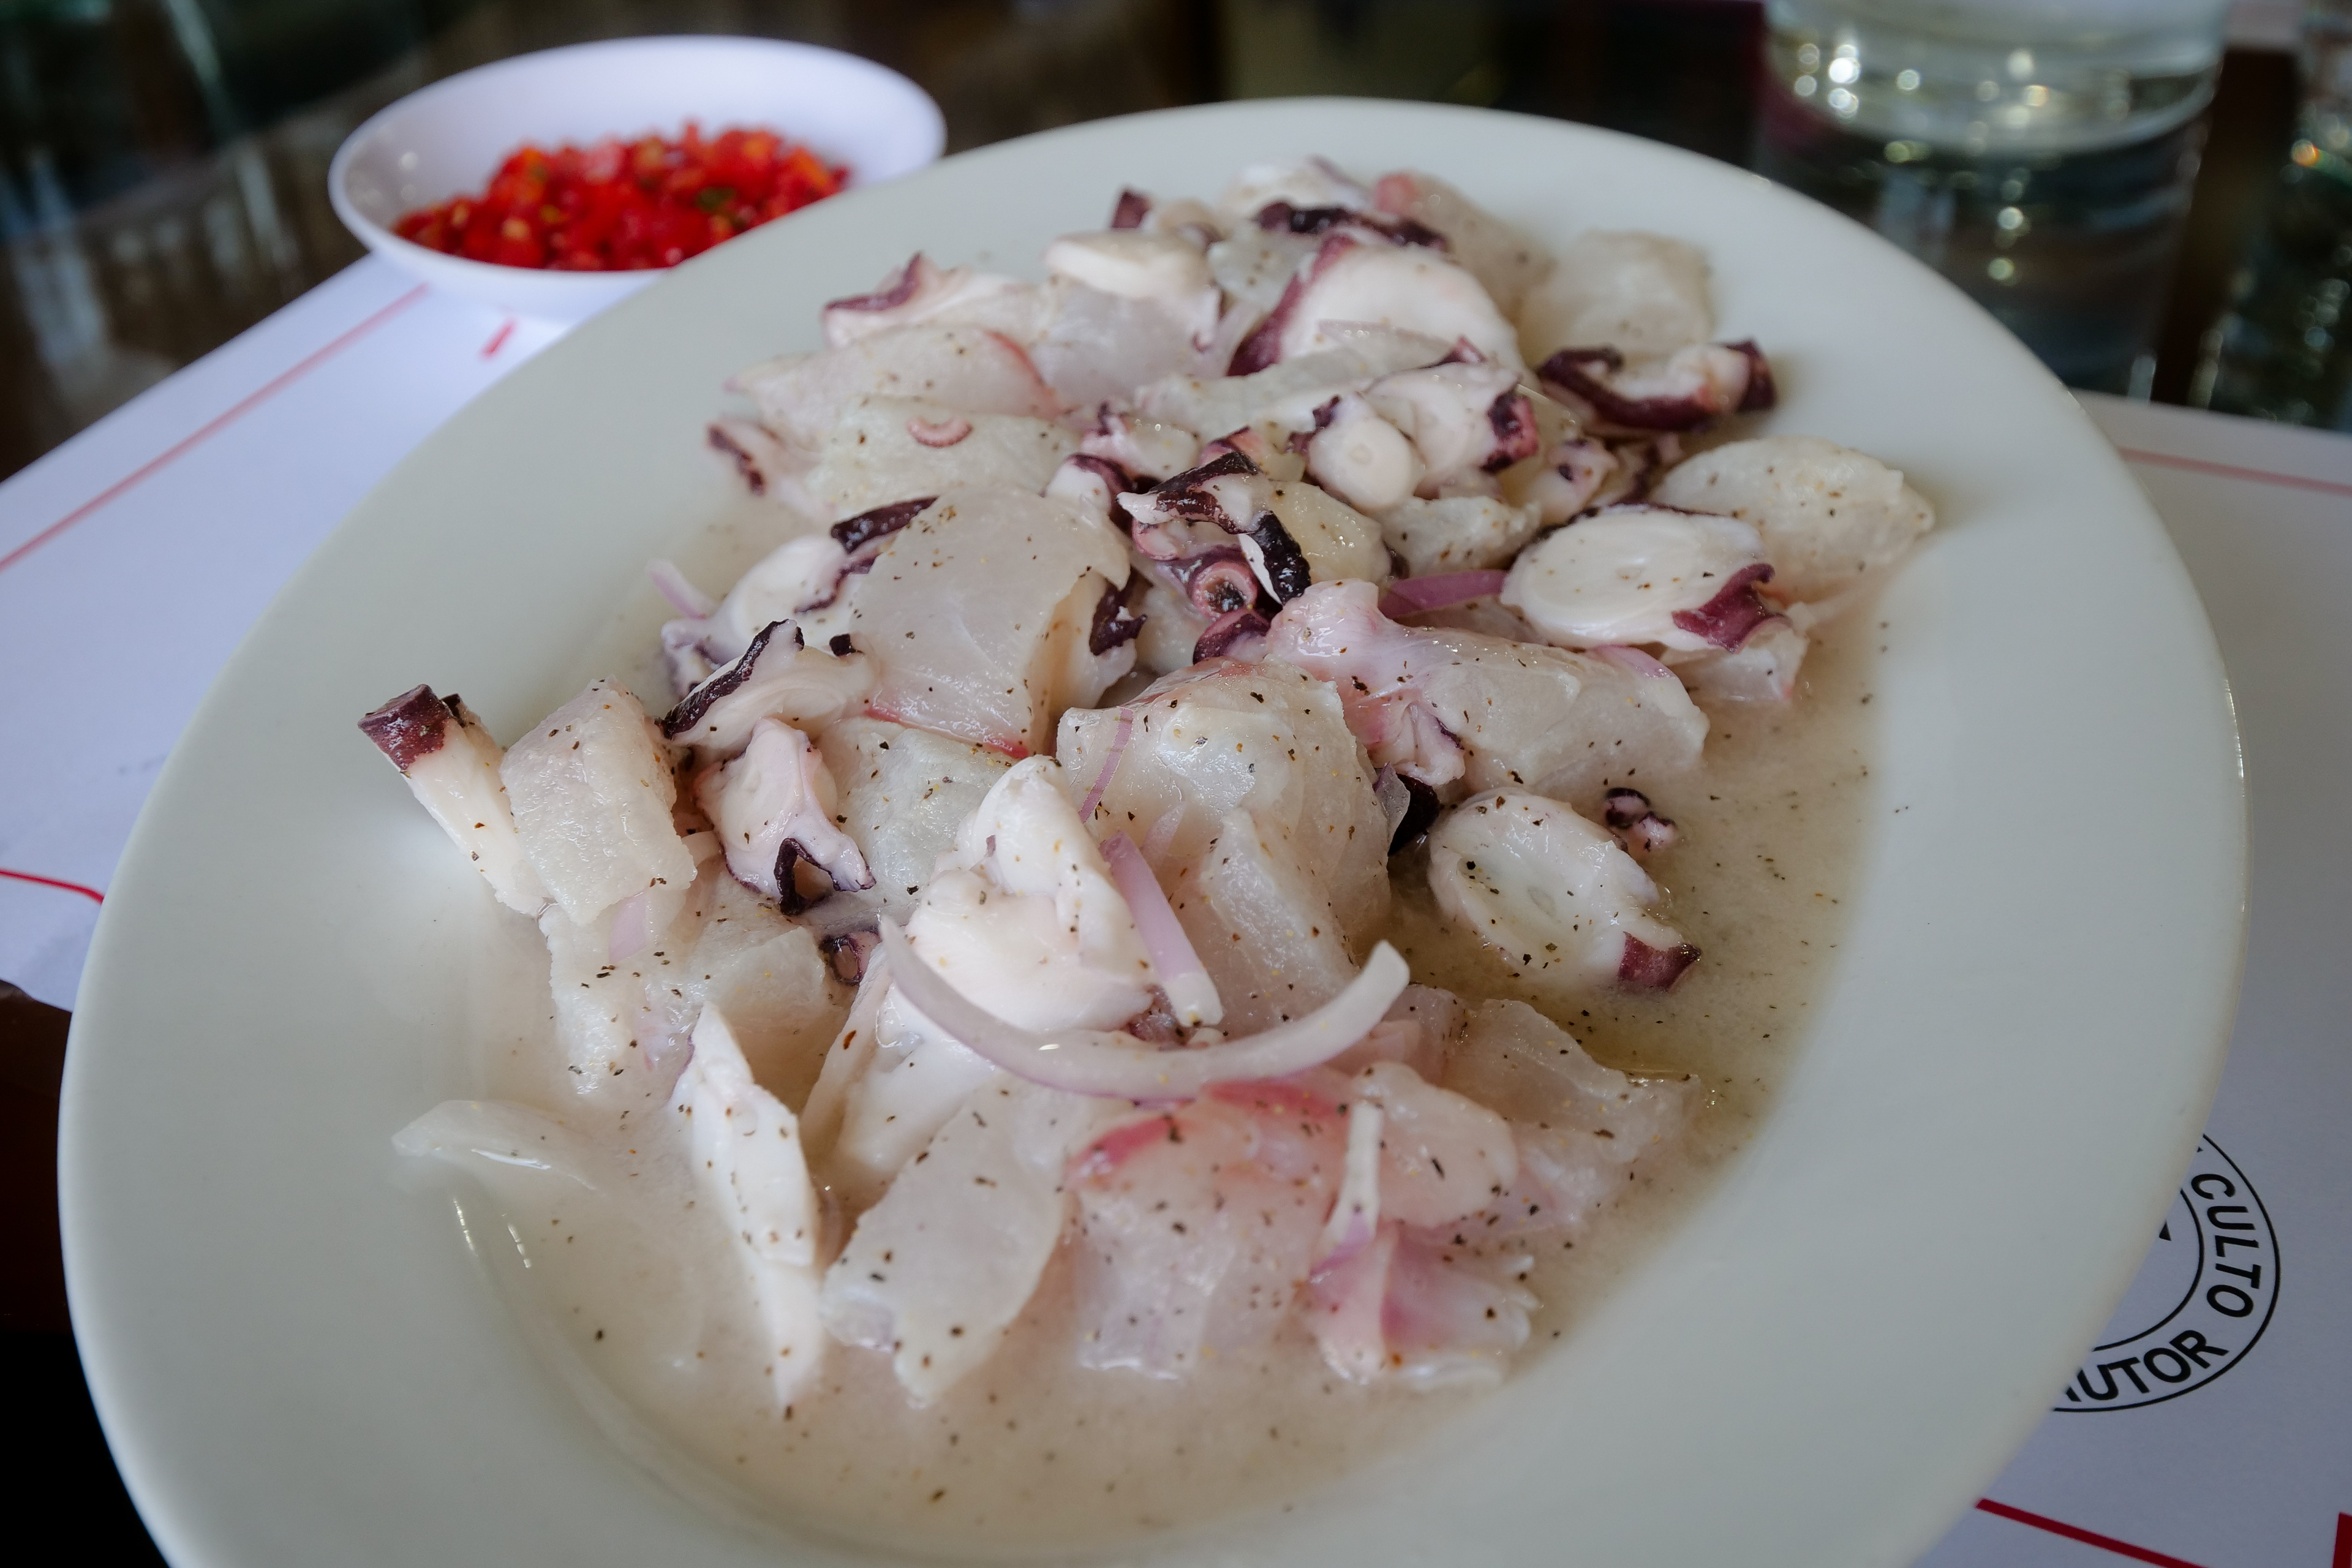
Chez Wong
Address: Enrique León García 114, La Victoria 15034, Peru
Mark Wiens ate: Ceviche made from fresh Peruvian sole (flounder), stir fry of flounder and tangerine slices. There’s no menu, you just eat what Chef Javier Wong cooks for the day.
Notes: Reservations required, only open from 1 pm – 3:30 pm on Tuesday – Saturday, to ensure fish is extremely fresh, ate here with Timour
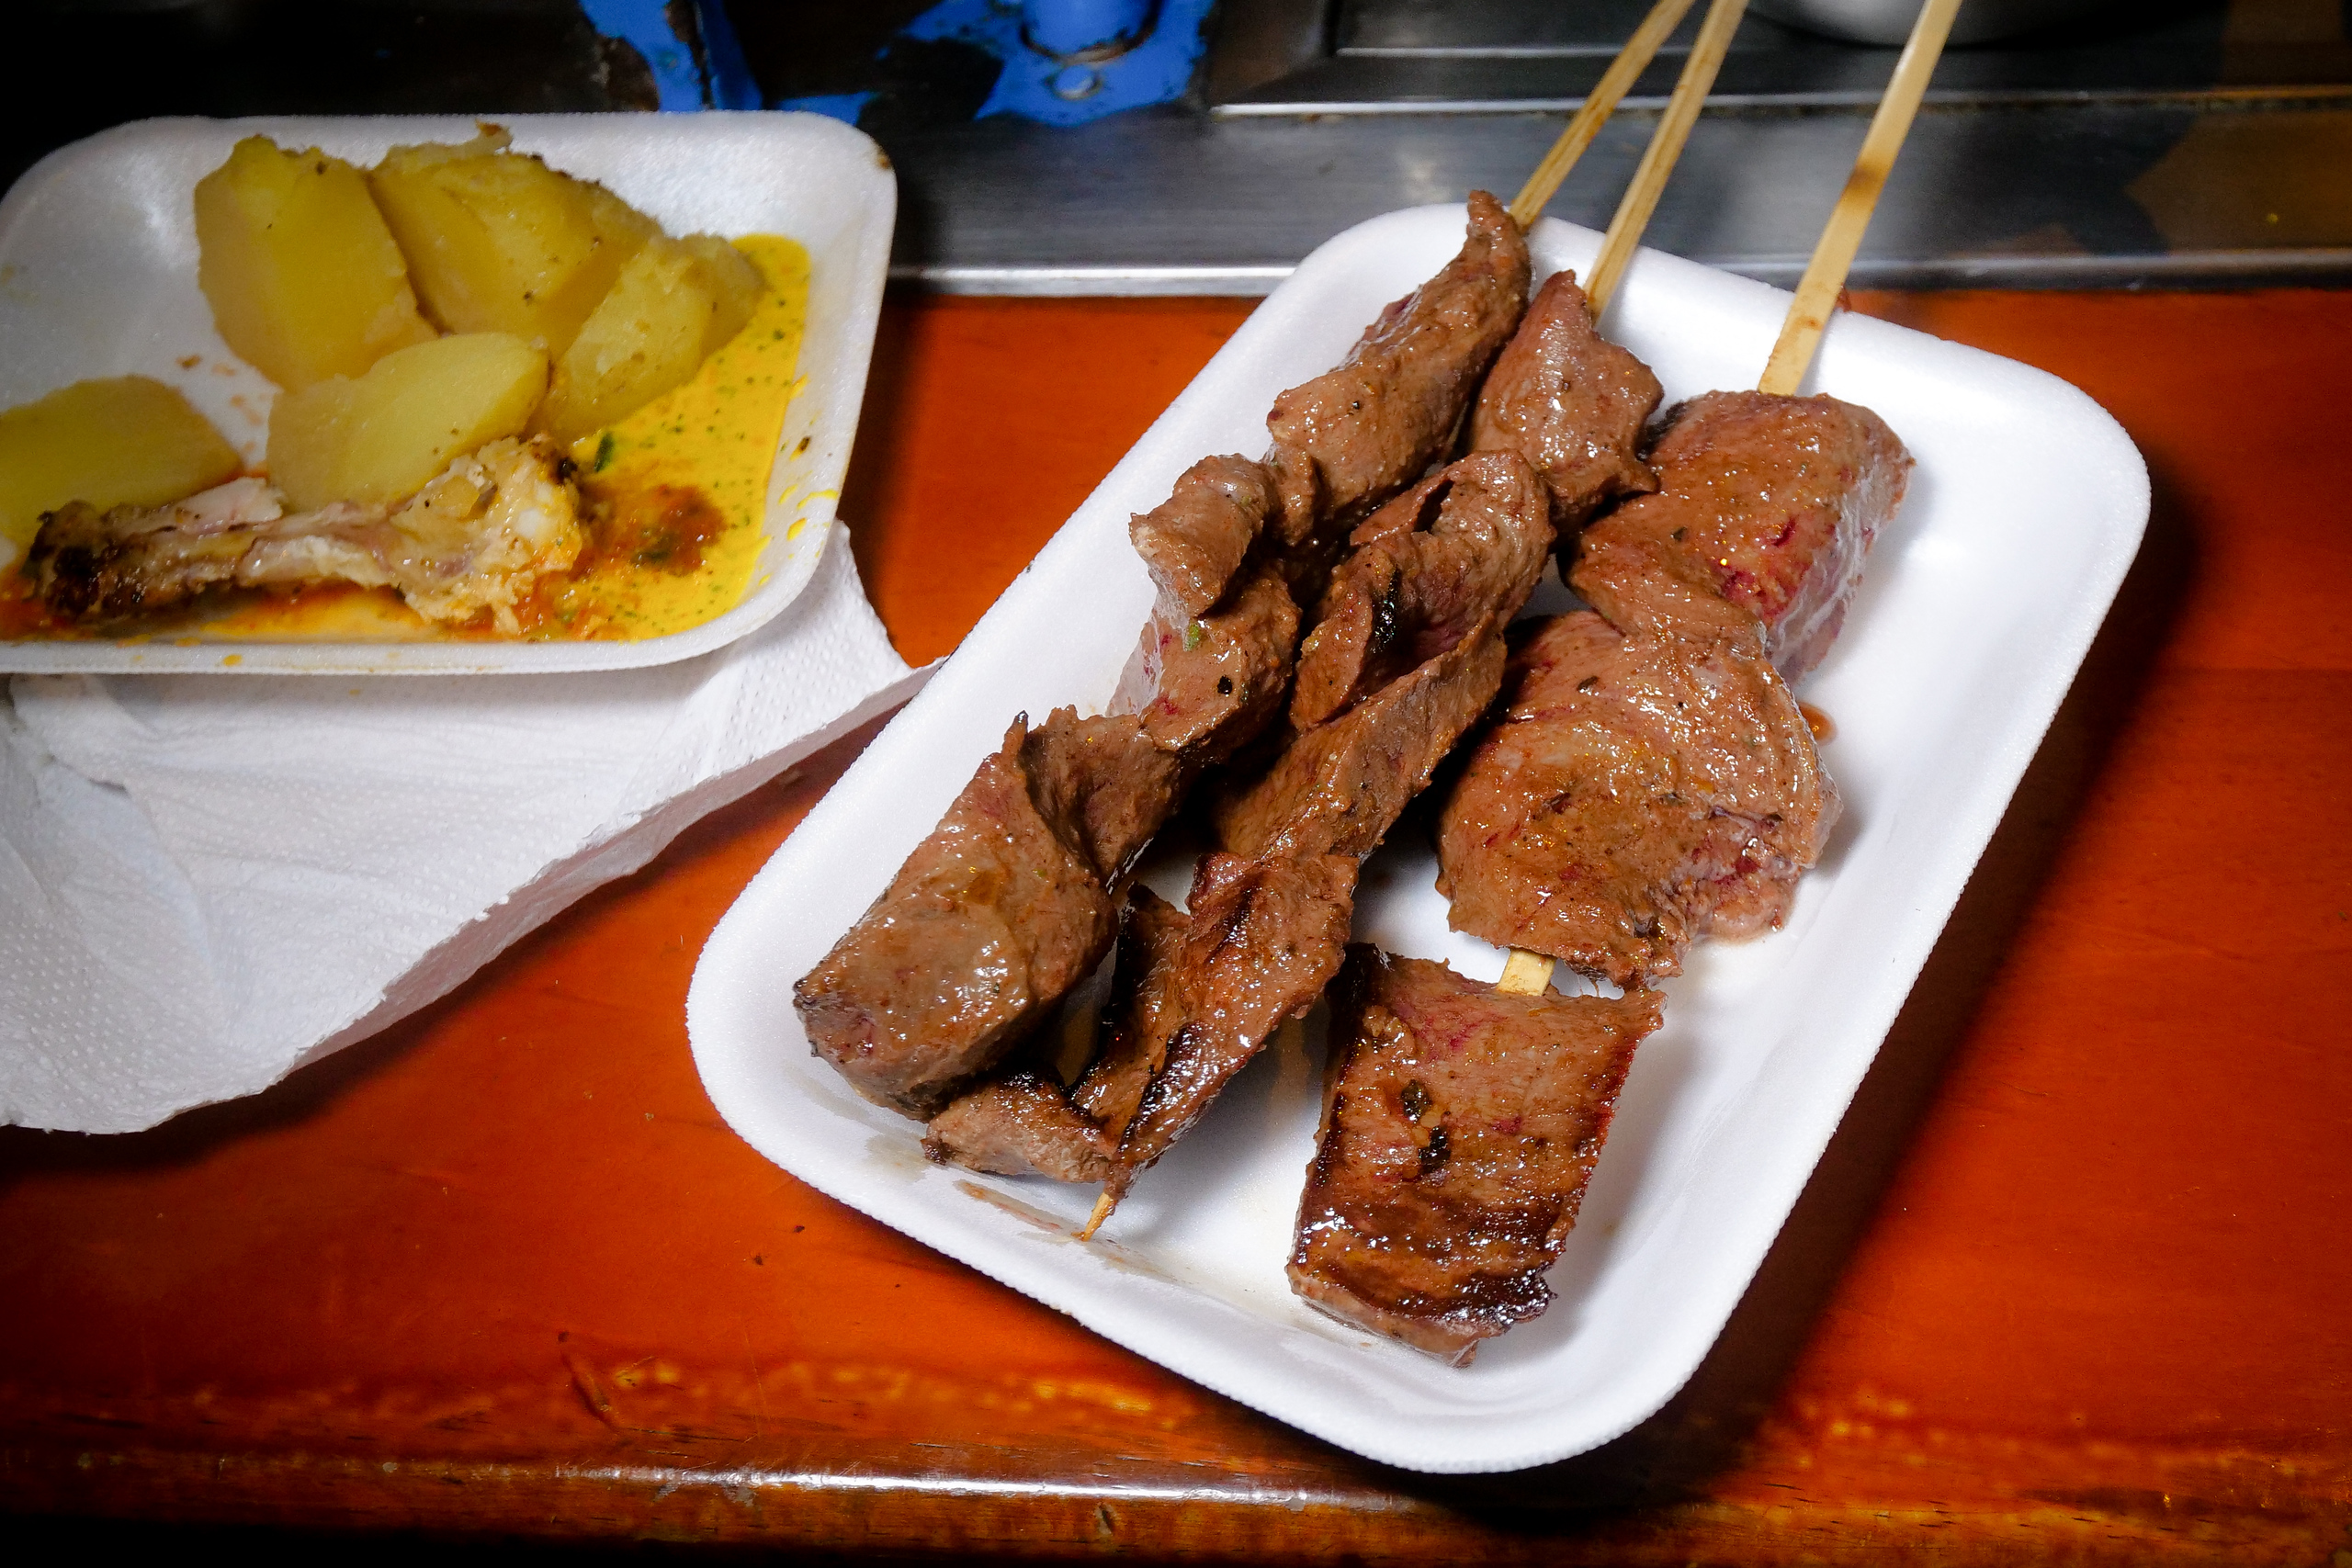
Anticuchos Doña Manuela
Address: José Domingo Choquehuanca 499, Distrito de Lima 15074, Peru
Mark Wiens ate: chicken wings, beef heart anticuchos
Notes: Anticuchos are the ultimate of all Peruvian street food in Lima, and they are something truly extraordinary that you don’t want to miss.
María Zuñiga
Mark ate: Lomo saltado, tamales, arroz con pollo, ají de gallina
Notes: María Zuñiga is a master of traditional Peruvian food and she serves private meals out of her kitchen. She’s an amazing person, and her food shines. Send her a message for reservation. Thanks to Timour for arranging.
Océano Azul
Address: Calle José Galvez 570, Lima 15074, Peru
Mark Wiens ate: seafood, ceviche of a few kinds, and fried rice
Notes: Not the best ceviche in Lima, but pretty good, and great location for seafood in Miraflores
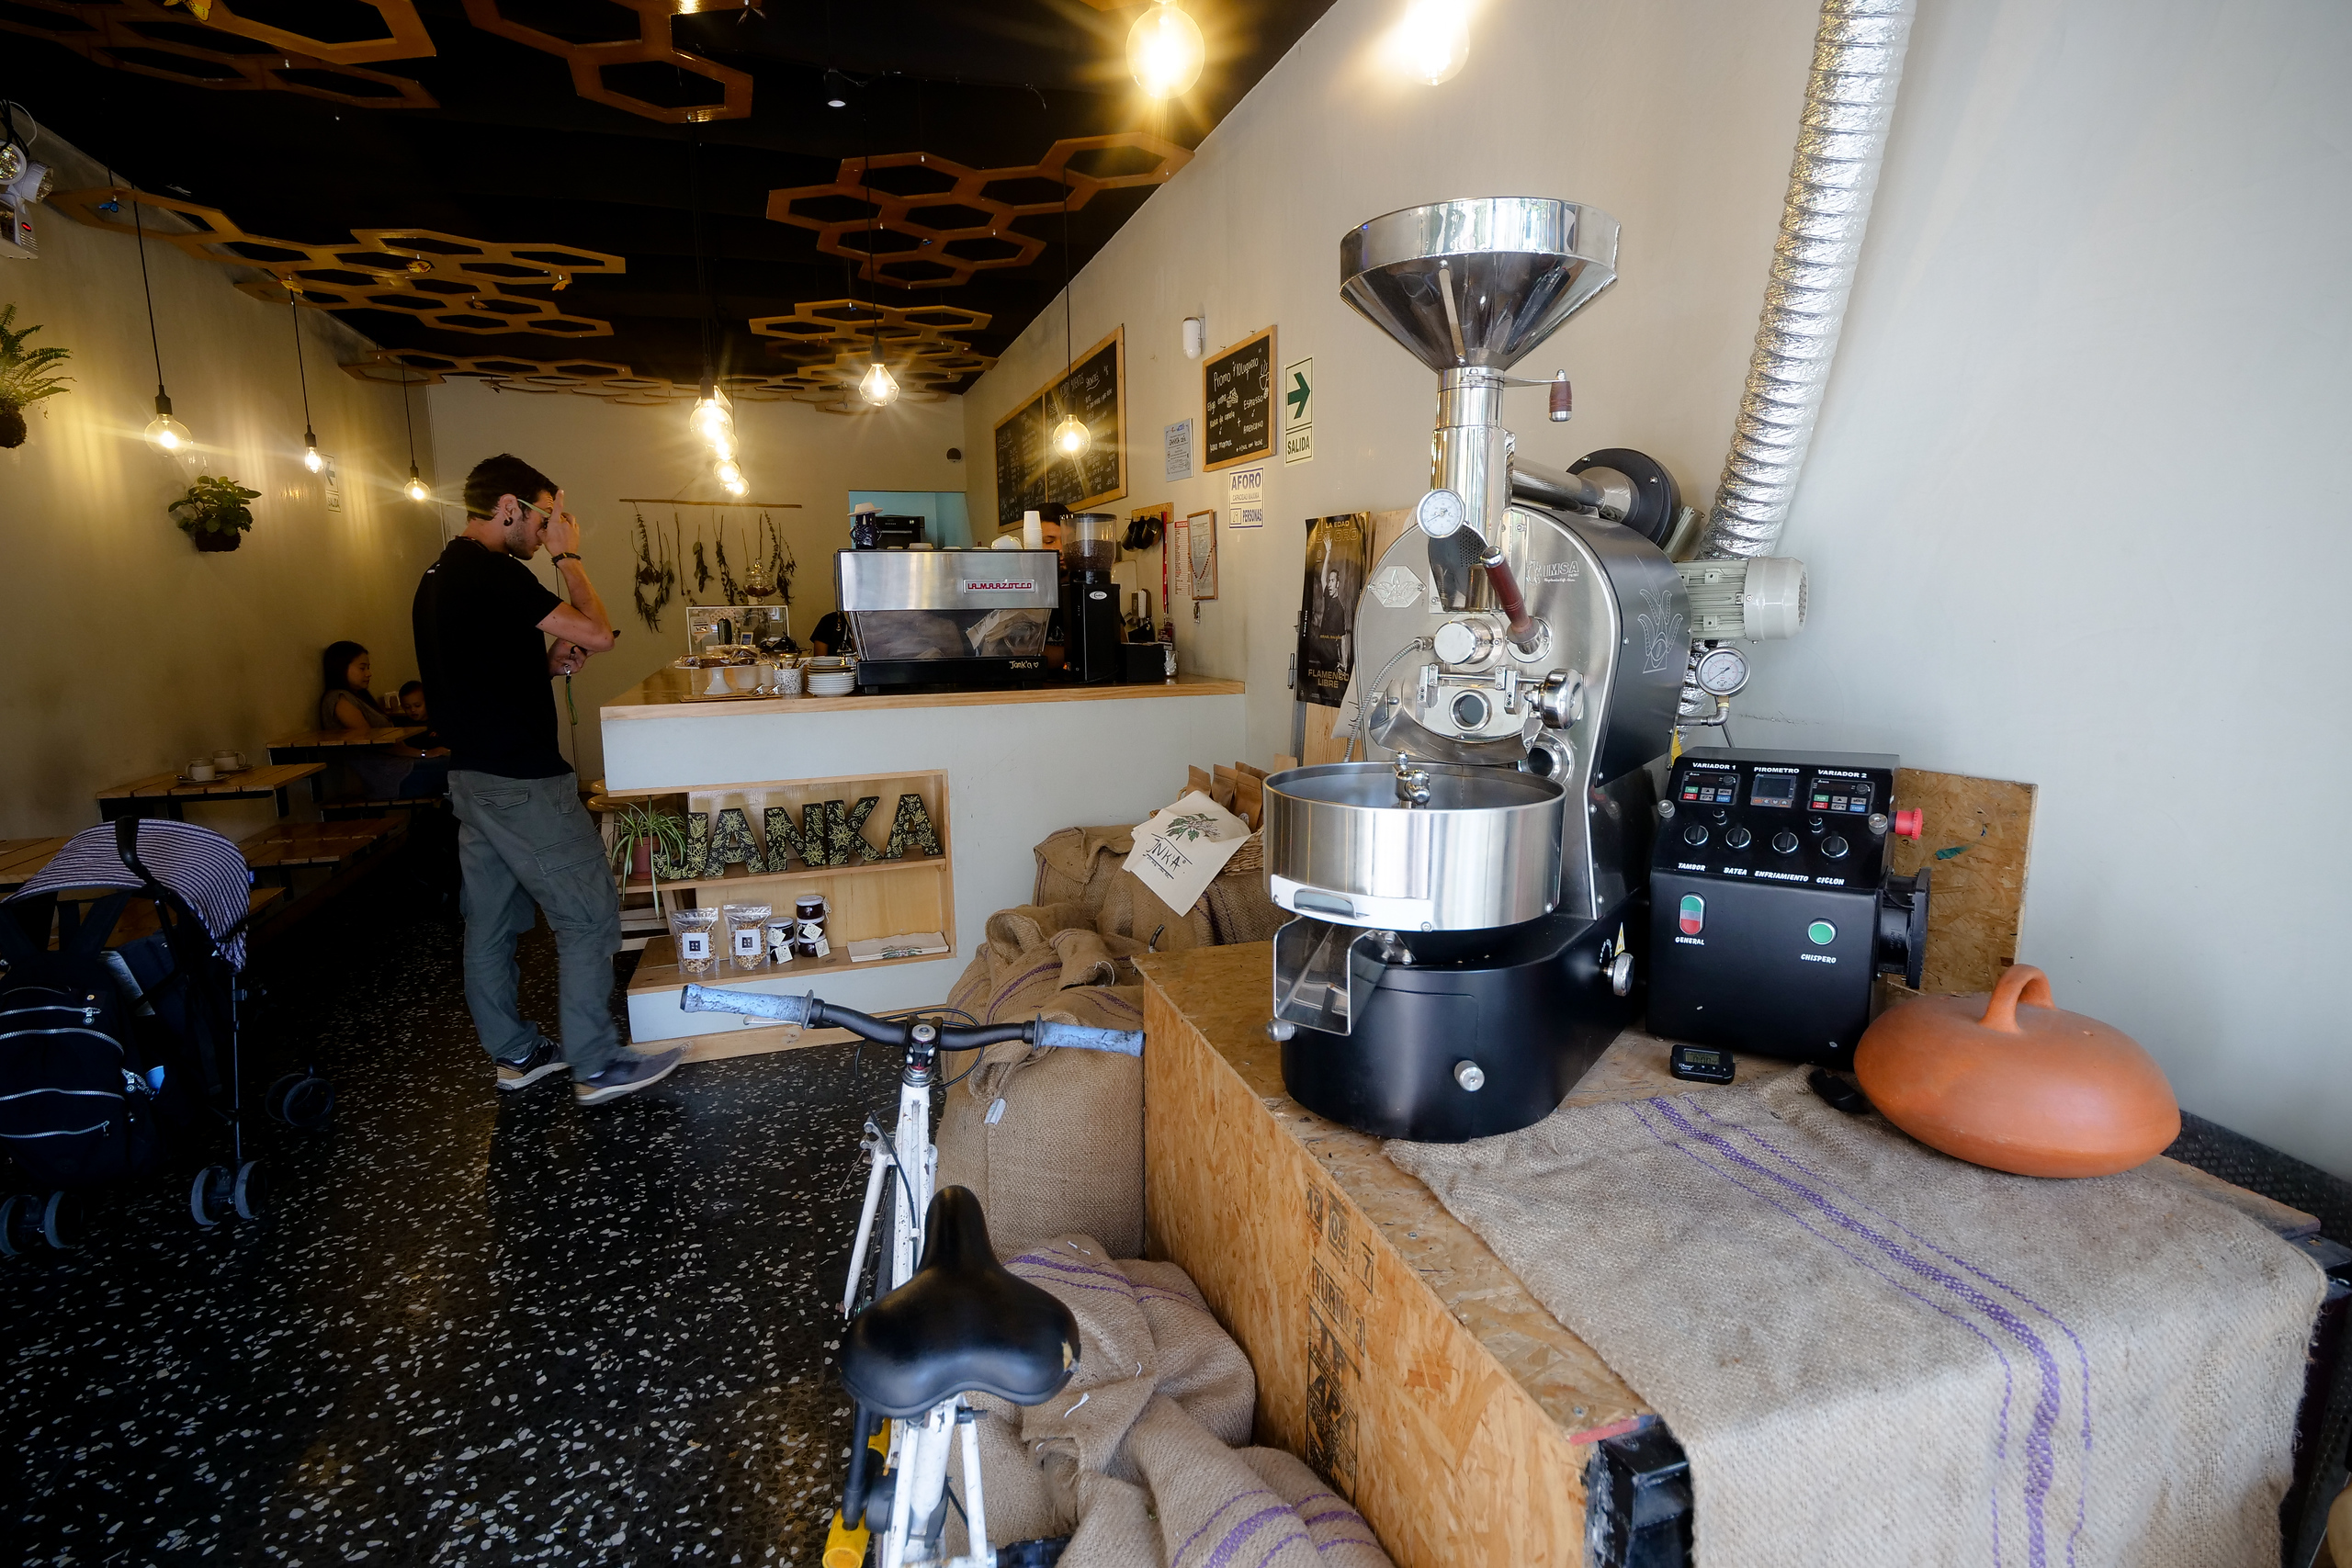
Jank’a Café – Coffee
Address: Calle Porta 178, Miraflores 15074, Peru
Mark Wiens: I had a chance to try quite a few coffee shops in Lima, and my favorite is Jank’a Café. They roast their own beans from Cuzco, and they serve an amazing cup of coffee. Puku Puku Café is also a good option, but nowhere to sit.
Accommodation
For my trip to Lima, we rented an apartment on Airbnb (use this link to get $40 of your first booking) in Miraflores. Miraflores one of the best areas of Lima to stay when you’re in Lima.